Well, I was not picked to participate in this years Fabricista contest sponsored by Fabric Mart. But, I can still sew along!
The challenge was to make a sweater knit garment. The participants were given three yards of abstract print sweater knit. The rest of us in the sew-along were on our own!
I dug through my stash and found several possibilities. One was a red-pink leftover, I thought about combining it with black denim (the rules don’t specifically exclude other fabrics, and I’m just sewing along so I can bend and even break rules). I still may do this, maybe in a jeans style jacket.
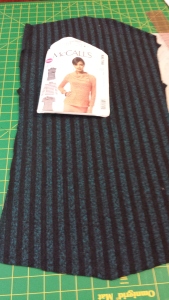
In the end, I chose a black and heathered teal stripe polyester sweater knit from Fabric Mart. The contestants got three yards, but I had only two.
Sewing Tip: Not all knits are the same! Most patterns made for knits have a stretch chart printed on the pattern envelope. The pattern is sized for knits with that amount of stretch. If your knit is not as stretchy, the finished garment may be hard to get on or off, or maybe not fit at all. You can use knits that stretch more, but not less, than the amount the pattern needs.
I like the collar from McCall’s 6796 . I extended the bodice to tunic length. I also lengthened the sleeves. Some designers are showing very long, ruched sleeves on sweaters this fall, so that’s what I did with my sleeves.
Then I was left with one final, difficult choice. Which buttons to use? I found several possibilities in my button box, and settled on some plastic copper-ish colored shank buttons featuring a smooth dome wrapped with a rope.
Sewing Tip: Gravity Rules. Knits are stretchy! Soft, stretchy, drippy knits can slide out of shape when you’re pinning the pattern on them. When cutting knits on a table, it’s important to keep ALL the fabric on the table. If the knit is allowed to drape off the edge, it will begin to stretch, pulling and distorting the rest of the fabric under the pattern pieces. The end result is badly cut, possibly misshapen and maybe unusable pieces. Keep all the fabric on the same level to prevent distortion.
I vacuumed the hallway carpet before moving my cutting mat and fabric onto the floor. I used the floor because all the fabric is on the same level. It can’t fall off a table or drape over an edge. Kay-see Cat (aka the Cheshire Cat) loves to lay on fabric and roll on the cutting mat – when everything is on the table. When the cutting mat is on the hallway floor, Kay-see won’t step on it, she tiptoes along the edge against the wall to get past it! Silly cat it’s the same mat!
The pattern is simple, a front and back both cut on folds, a sleeve and a collar. There are no darts. It was easy to cut the single layer collar. It was a little trickier to make sure the stripe ran smoothly all the way across the folded fabric, I used pins to identify which stripe was which.
The main construction steps went fairly quickly. I stay stitched along the front and back neck edges. I sewed the shoulder and side seams directly on the serger. I sewed a strip of narrow satin ribbon into the shoulder seam to stabilize it and keep it from stretching. I sewed the sleeve seams on the serger. I sewed quite slowly, making sure the stripes matched along the side and sleeve seams.
Sewing Tip: Don’t pull on it! Knits sometimes move unevenly under the presser foot. The feed dogs pull the lower layer back away from you while the presser foot pushed the top layer towards you. The top layer creeps down the seam while the bottom layer creeps up. If you’re sewing something like stripes, the stripes won’t line up. It’s really tempting, especially on a serger, to try to fix this by stretching both layers until they appear even. They might be even, but they will also be distorted. A seam that’s stretched as it’s sewn on a serger will ripple. Use a stabilizer or tissue under the seam or over the seam or both. On a regular machine, try a special walking foot. Some machines allow you to control the presser foot pressure, if yours does, you can try easing the pressure a bit. On a serger, you might need to adjust the differential feed (see your sergers instruction manual or a serger reference book).
For the collar, I folded it right sides together, serged the short ends, turned it right side out, and basted the long, raw edges together with a long machine basting stitch.
I’m not sure I love the way the instructions tell you to install the collar, and I’m not sure I love the way I installed the collar, and I’m not sure if the method I used is the method the pattern is describing. I serged the long raw edge of the collar to the neck edge, on the right side of the bodice. Then I folded the serged hem allowance down against the inside of the bodice. I moved the collar up and out of the way, and topstitched the seam allowance down against the bodice. The stitches blend in with the serged allowance on the inside, and are hidden under the collar on the right side.
The sleeve has a high cap so I used a line of ease stitching to fit it into the armhole. I stitched this seam on the regular machine first, then finished it on my serger.
I love my new sweater! I finished it when the weather was still warm (unusually warm for Ohio). I finally got to wear it in mid-November!


