Monthly Archives: December 2016

Cute Lekala Pullover with Ruching and Decorative Buttons

I absolutely LOVE the color of this cotton/wool/spandex knit. I HAD to make something from it as soon as I pulled it out of the FabricMart box!

Pullover in cotton-wool-spandex knit with ruching and decorative buttons

Pullover in cotton-wool-spandex knit with ruching and decorative buttons

I wanted something long sleeve and not too plain. I picked this draped front top with a row of decorative buttons along the left side. The front is actually two layers, a gathered layer over a flat layer.

The fabric was easy to work with, and a refreshing change of pace after my last few makes. The pattern has four main pieces; back, under front, over front, sleeve. It also includes a narrow band at the hem, which I eliminated. I sort of wish I had used the band, to make the hem easier and maybe neater, too.

I was so excited I forgot to take wip photos. I used a serger for construction seams. This pattern has a lot of topstitching. All three bodice pieces are finished with topstitching, as is the left side of the over front.

The pattern calls for 10 buttons, but does not indicate size. I chose 1″ black wooden buttons. There are no buttonholes. The buttons are sewn to both layers, and hold the ruching in place.

In the photo I’m wearing an ivory t-shirt under the top. I was at a dance hafla, and the t is part of my dance costume. So I just wore the t under the top.

At first, I wasn’t sure I liked the end result. Loved the color, but I was worried that the fabric might have been a little too stiff or thick for the ruching. When I was finished, I decided I like it.

Both front pieces are hemmed together. This is the only spot where I had a little bit of trouble, the top layer didn’t want to sit smoothly in the hem. I think that’s why the pattern includes the hem band, to help control the upper layer.

I think this would be a fun top in a soft, thin sweater knit with a hood. When (if) I make it again, I’ll use the band at the hem.

Leave a comment

Filed under sewing

To Boldly Sew – A Star Trek:TOS Womens Uniform and the Captains Shirt

When Hubby learned that a studio full of recreated sets from Star Trek:TOS was offering tours, I knew we’d be going to visit. And for that, we’d need uniforms.

A genuine Tribble from the actual set and episode

A genuine Tribble from the actual set and episode

My Mini Dress 

The womens dresses on TOS are one piece long sleeved mini-dresses. The outfits worn on the series feature unusual style lines. The bodice is divided into fan and wedge shaped sections, with seams forming a starburst pattern. My vintage Star Trek:TOS pattern is a simple pull over tunic. I wanted something a little more authentic.

It wasn’t hard to find PTN-018, which is an authentic replica of the starburst style mini dresses. I believe it was originally issued by Roddenberry Shop. I purchased my copy from Xscapesprops.com

But before I bought it, I checked Sewing Pattern Review. The reviews of this pattern were pretty bad. So I began searching both vintage and modern dress patterns, from the big commercial companies and small independents, looking for any dress or top with the wedge shapes pieces and starburst seaming. I could find nothing except PTN-018.

If you want the authentic starburst style womens uniform from ST:TOS, this is the only available pattern. But be warned – it’s a terrible pattern!

I was prepared for a challenge. I knew a mock up was vital. It would be foolish to skip this step with this pattern.

Wedge shaped pieces, cut on pleat

Wedge shaped pieces, cut on pleat

I knew I’d use stretch velvet for the actual uniform, so I chose a hippie-style print knit for my mock up. Both have nap, the velvet has the pile nap and the print has a one way design. The velvet came from Fabric Mart about a year ago. I’m not sure where the hippie print came from, I suspect maybe a Fabric Mart bundle.

This pattern is a wasteful fabric hog. If the fabric has nap, nothing can be done about that. Some of the odd shaped pattern pieces must sit on the grain at an awkward angle,

so the fabric will stretch and hang properly. If you are using a good 4 way stretch fabric with no nap and no right or wrong side, you might be able to squeeze pieces closer together to reduce waste, by flipping them upside down or setting them on the crossgrain. I couldn’t do that, and so I ended up with a big pile of scraps from both the mock up and the final uniform.

The instructions apologise for having one pattern piece printed on two separate pieces of paper, requiring you to tape the pieces together. There’s a lot more serious issues here than just taping one pattern piece together.
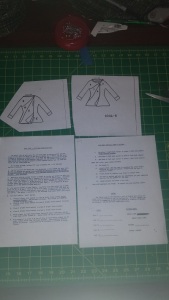
The Instructions

The Instructions

In theory, it isn’t too hard to put the pattern pieces together. Piece A is sewn to piece B, etc. But the instructions are completely unclear. The crude, hand drawn diagrams showing how the pieces fit together are essential guides.

The neck opening on the mock up turned out stupidly large. As in, 42 inches large. How do you even draft a pattern with a neck opening bigger than the hips??

I “fixed” the problem by taking deep darts along the neck. As I looked at those darts on the inside out mock up, I gradually realized I had actually added a shoulder seam to the design. The downside of this solution is that it raised the waist well above my natural waistline.

This pattern is SHORT!! Yes, I know these uniforms are VERY short on the women in ST:TOS. I made the mock up just an inch or so longer than the pattern. But, I wanted something that covered my bottom and at least part of my thigh, so I added about 6″ to the length of the skirt.

There is no Lengthen Here marking on the pattern. And 6″ is a lot to add in one spot. I picked two spots, and lengthened the skirt 3″ at each spot.

The sleeves were just a little short. I added about 2″ or so for a nice hem on the final uniform.

The instructions suggest sewing both the upper arm seam and the lower arm seam completely, then applying the rank insignia braid. It’s much easier to leave most of the under arm seam unsewn and apply the brain to the flattened sleeve. Then finish sewing the under arm seam and hem the sleeve. I used replica braid from Xscapesprops.com.

On the Bridge

On the Bridge

To apply the braid I used clear thread in the machine and ordinary thread in the bobbin. I used an even zig zag stitch to apply the long braid strip. I used a narrow to wide to narrow zigzag stitch pattern to apply the broken braid sections.

The armhole is high and there’s little ease in the upper arm. I used a very stretchy fabric, so these fitting idiosyncrasies weren’t an issue for me.

The corner of the pleat on the skirt is supposed to be tacked to the closest starburst seam, but it actually ended up in the middle of my belly. The pleat needs to be deeper to reach the nearest seam (it might work better on someone with a flat stomach).

I was surprised the narrow collar was just one piece. It didn’t make sense. Maybe you’re supposed to cut two pieces and seam them together along the long, straight side? But the pattern piece says “Cut 1”, and the instructions don’t say anything about sewing two pieces together. All they do is suggest interfacing the collar if it’s too soft.

I made the collar about 3/4 inch deeper, and placed that long straight side on a fold. I cut the short ends and shaped long side. I applied the folded collar to the neck edge with my serger.

I omitted the zipper. My fabric is stretchy enough to pull the dress on and off.

The zipper instructions didn’t make any sense. If I were to make this costume again, in a fabric that required a zipper, I’d ignore the instructions completely and put an invisible zipper into one of the side seams.

In the end I am happy with my uniform. But it was a long struggle to get this pattern to that point. Unfortunately, I could not find any other patterns, and didn’t want to draft my own, so using this pattern as a starting point was the only solution.

The Captains Shirt

Captain and Friends

Captain and Friends

Hubby’s costume was much, much easier. The mens uniform shirts are just raglan sleeve pullovers with a slightly modified V-neck. I have several raglan sleeve pullovers in my size, but none that would fit him. Instead of messing around grading one of my patterns, I picked up Simplicity 1605 and cut a L-XL.

I used a gold stretch velvet from Spandex World, and black polyester ribbing from my stash. The pattern was simple, but I mismeasured the neck band. So, as a quick fix, I took a tuck in the neck band on each side at the shoulder seam. I have plenty of ribbing, so I plan to replace the neckband before he wears it again.

Simplicity 1605 is a nice raglan sleeve pullover and pajama pants or shorts pattern. I didn’t look at the instructions until I decided to review the pattern, because I didn’t think I could write a complete review without looking at them. They were correct, concise and clear. They explained how to sew the seams on an ordinary straight stitch machine, a zigzag stitch machine and a serger.

The pattern pieces fit together perfectly. The notches matched up and the shirt fit. This is a good pattern for beginners. The top is a great basic piece that can be made up in short or long sleeves, in one solid color or color blocked For more advanced sewists who want to play with a raglan sleeve  design, this pattern is a nice starting point.


2 Comments

Filed under sewing

Sewing a Sweater : FabricMart 2016 Sew Along

Well, I was not picked to participate in this years Fabricista contest sponsored by Fabric Mart. But, I can still sew along!

Sweater knit and pattern

Sweater knit and pattern

The challenge was to make a sweater knit garment. The participants were given three yards of abstract print sweater knit. The rest of us in the sew-along were on our own!

I dug through my stash and found several possibilities. One was a red-pink leftover, I thought about combining it with black denim (the rules don’t specifically exclude other fabrics, and I’m just sewing along so I can bend and even break rules).  I still may do this, maybe in a jeans style jacket.

In the end, I chose a black and heathered teal stripe polyester sweater knit from Fabric Mart. The contestants got three yards, but I had only two.

Sewing Tip: Not all knits are the same! Most patterns made for knits have a stretch chart printed on the pattern envelope. The pattern is sized for knits with that amount of stretch. If your knit is not as stretchy, the finished garment may be hard to get on or off, or maybe not fit at all. You can use knits that stretch more, but not less, than the amount the pattern needs.

I like the collar from McCall’s 6796 . I extended the bodice to tunic length. I also lengthened the sleeves. Some designers are showing very long, ruched sleeves on sweaters this fall, so that’s what I did with my sleeves.

Then I was left with one final, difficult choice. Which buttons to use? I found several possibilities in my button box, and settled on some plastic copper-ish colored  shank buttons featuring a smooth dome wrapped with a rope.

Extended sleeves, one ruched, the other not yet

Extended sleeves, one ruched, the other not yet

Sewing Tip: Gravity Rules. Knits are stretchy! Soft, stretchy, drippy knits can slide out of shape when you’re pinning the pattern on them. When cutting knits on a table, it’s important to keep ALL the fabric on the table. If the knit is allowed to drape off the edge, it will begin to stretch, pulling and distorting the rest of the fabric under the pattern pieces. The end result is badly cut, possibly misshapen and maybe unusable pieces. Keep all the fabric on the same level to prevent distortion.

I vacuumed the hallway carpet before moving my cutting mat and fabric onto the floor. I used the floor because all the fabric is on the same level. It can’t fall off a table or drape over an edge. Kay-see Cat (aka the Cheshire Cat) loves to lay on fabric and roll on the cutting mat – when everything is on the table. When the cutting mat is on the hallway floor, Kay-see won’t step on it, she tiptoes along the edge against the wall to get past it! Silly cat it’s the same mat!

The pattern is simple, a front and back both cut on folds, a sleeve and a collar. There are no darts. It was easy to cut the single layer collar. It was a little trickier to make sure the stripe ran smoothly all the way across the folded fabric, I used pins to identify which stripe was which.

Buttons, buttons

Buttons, buttons

The main construction steps went fairly quickly. I stay stitched along the front and back neck edges. I sewed the shoulder and side seams directly on the serger. I sewed a strip of narrow satin ribbon into the shoulder seam to stabilize it and keep it from stretching. I sewed the sleeve seams on the serger. I sewed quite slowly, making sure the stripes matched along the side and sleeve seams.

Sewing Tip: Don’t pull on it! Knits sometimes move unevenly under the presser foot. The feed dogs pull the lower layer back away from you while the presser foot pushed the top layer towards you. The top layer creeps down the seam while the bottom layer creeps up. If you’re sewing something like stripes, the stripes won’t line up.  It’s really tempting, especially on a serger, to try to fix this by stretching both layers until they appear even. They might be even, but they will also be distorted. A seam that’s stretched as it’s sewn on a serger will ripple. Use a stabilizer or tissue under the seam or over the seam or both. On a regular machine,  try a special walking foot. Some machines allow you to control the presser foot pressure, if yours does, you can try easing the pressure a bit. On a serger, you might need to adjust the differential feed (see your sergers instruction manual or a serger reference book).

Finished Sweater

Finished Sweater

For the collar, I folded it right sides together, serged the short ends, turned it right side out, and basted the long, raw edges together with a long machine basting stitch.

I’m not sure I love the way the instructions tell you to install the collar, and I’m not sure I love the way I installed the collar, and I’m not sure if the method I used is the method the pattern is describing.  I serged the long raw edge of the collar to the neck edge, on the right side of the bodice. Then I folded the serged hem allowance down against the inside of the bodice. I moved the collar up and out of the way, and topstitched the seam allowance down against the bodice. The stitches blend in with the serged allowance on the inside, and are hidden under the collar on the right side.

The sleeve has a high cap so I used a line of ease stitching to fit it into the armhole. I stitched this seam on the regular machine first, then finished it on my serger.

I love my new sweater! I finished it when the weather was still warm (unusually warm for Ohio). I finally got to wear it in mid-November!

Leave a comment

Filed under sewing