Monthly Archives: March 2019

Vogue 7876 – Hacked into a Dress

I needed a nice dress for a black tie optional wedding in Charleston, SC. The azaleas, rhododendrons and wisteria were in bloom. I realized the dark, short dress I planned to wear just wouldn’t work. So I made a different dress, McCalls 2501.

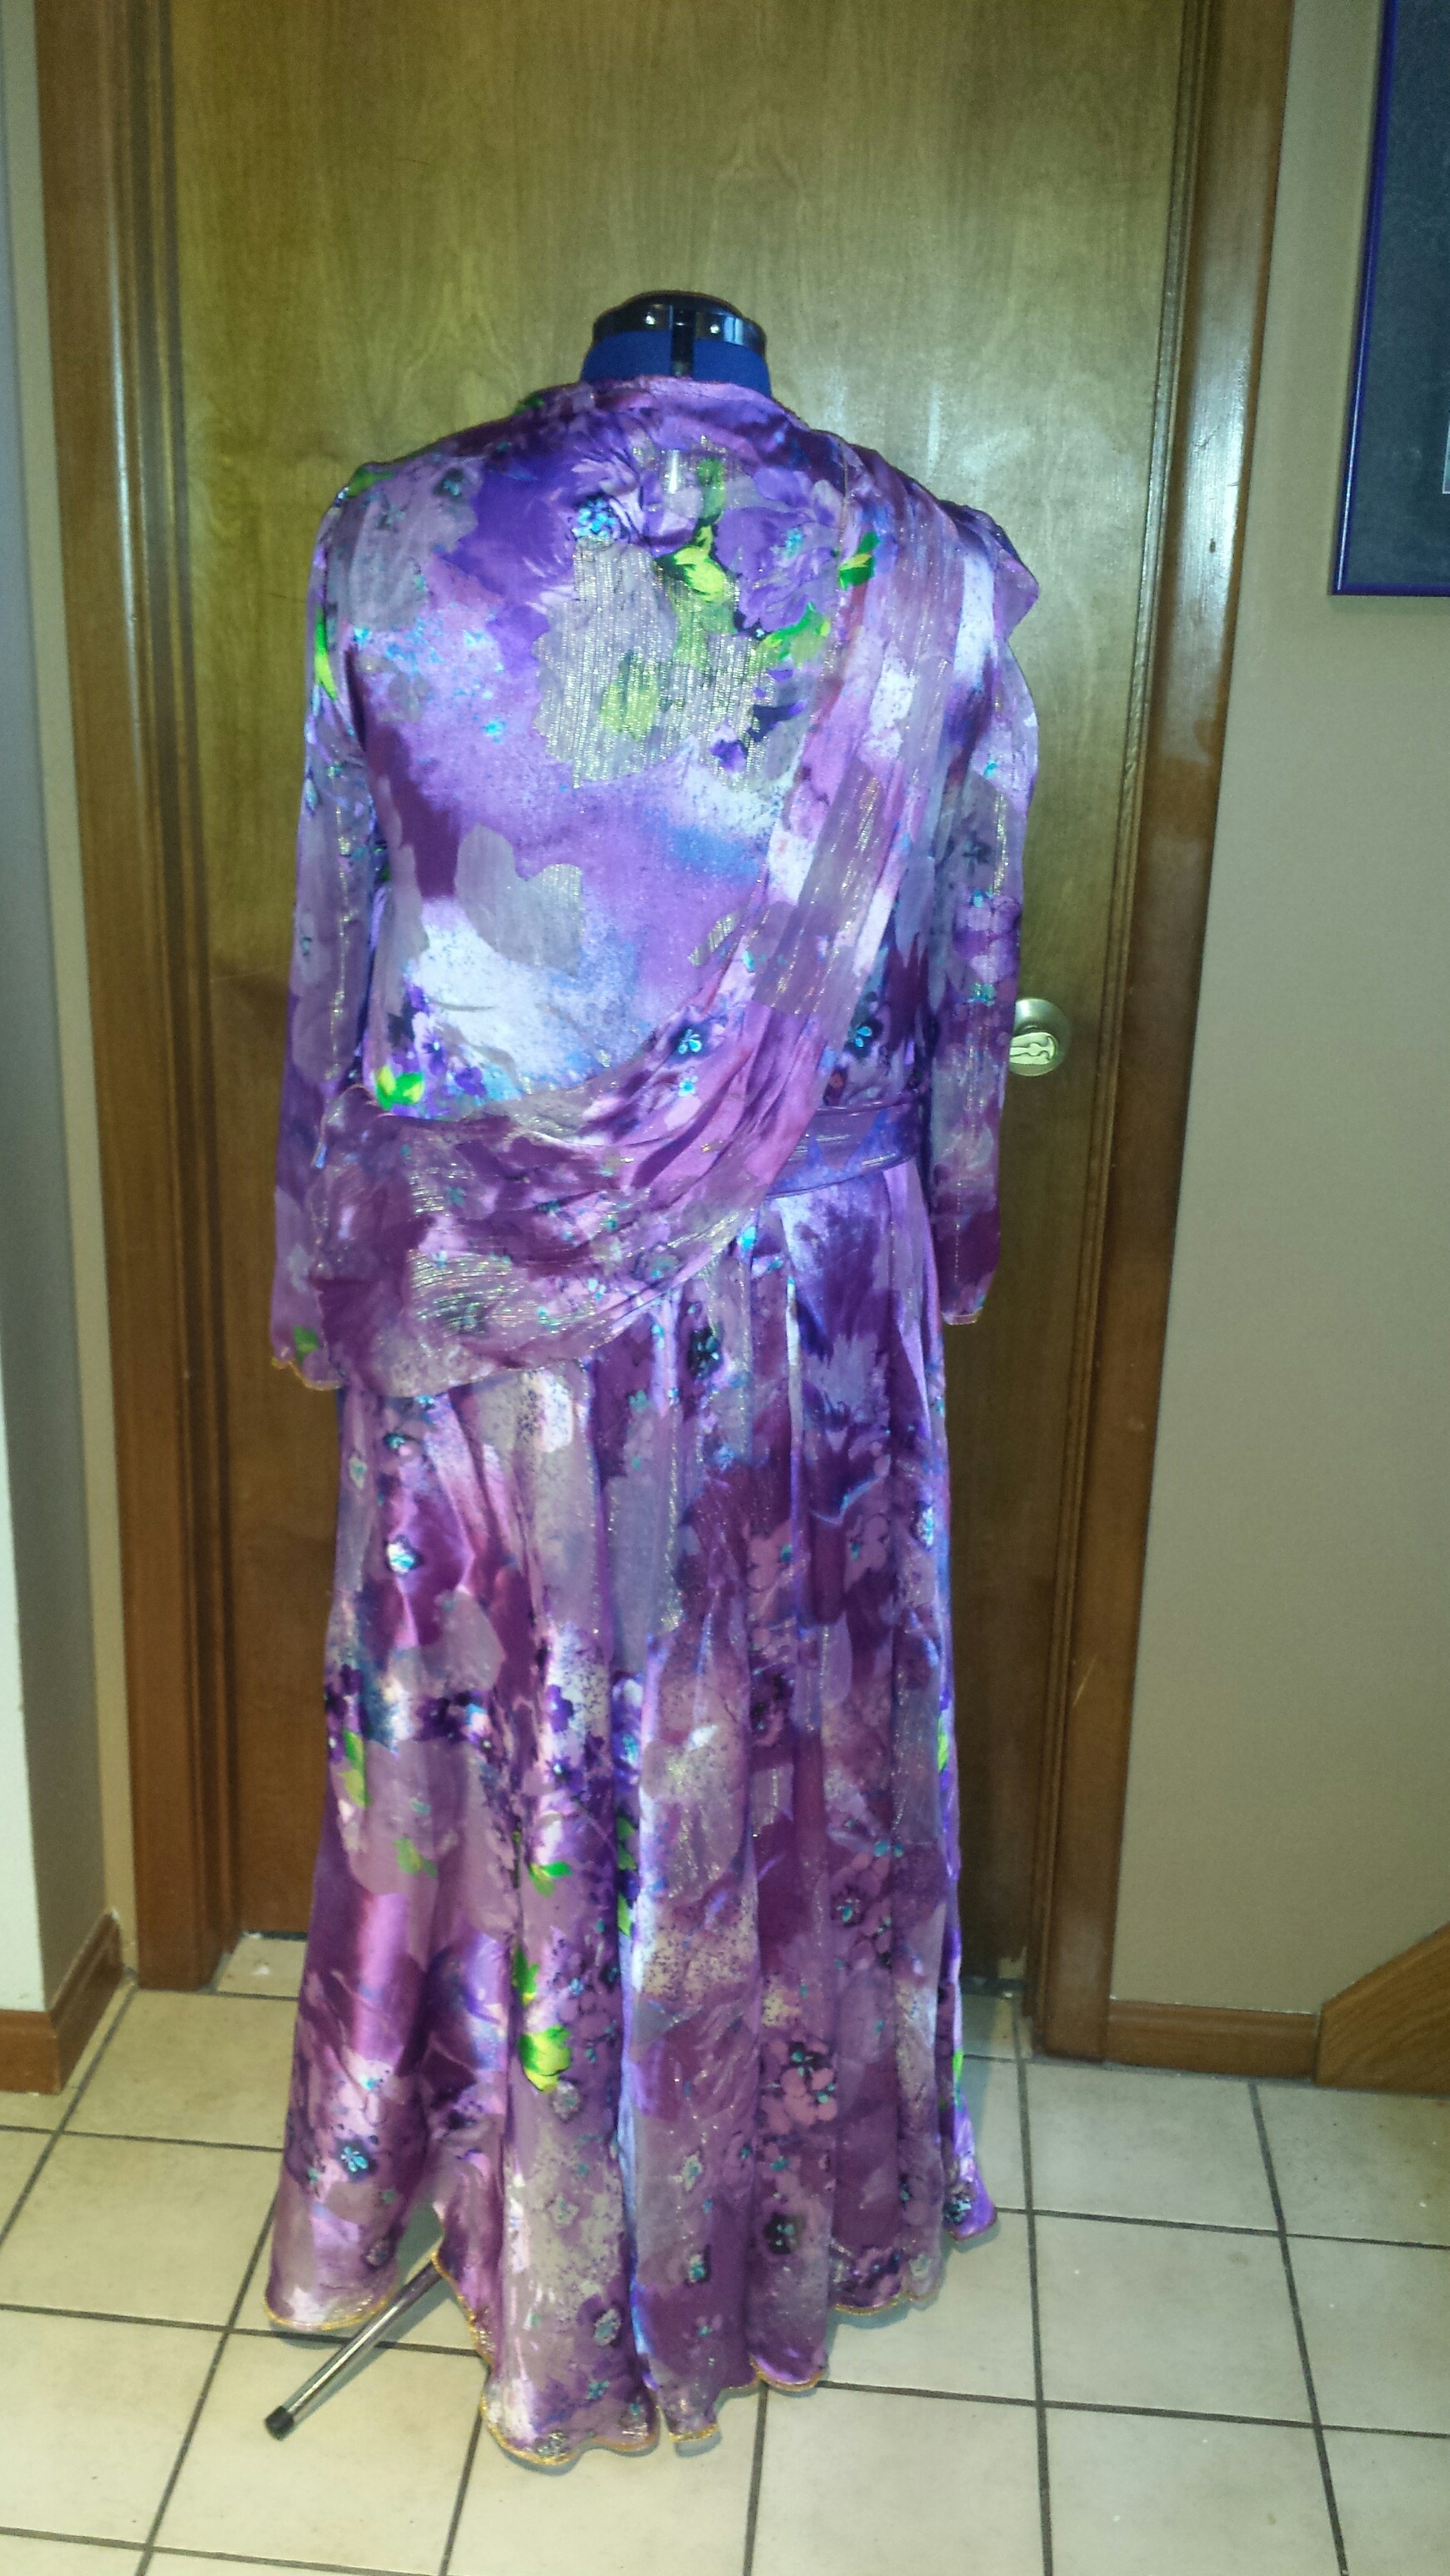
Then I got the most amazing silk charmeuse burn out chiffon, from Fabric Mart. I had to use it! The large scale, purple floral print is shot through with metallic gold. I loved it! And it went on sale again day after my first piece arrived! So I promptly ordered 8 more yards and began searching for a dress pattern.

Vogue 7876 popped up in a thread somewhere on the PR forums. I loved the drape along the wrap front. Several high end formals from high end stores are showing drapes, particularly over the arms or in the back. I decided to make view E, with long sleeves, extend the blouse into a drop waist bodice with a full circle skirt, and maybe add a drape in back.

This modified design gobbled fabric. A lot of fabric!

My original plan was to line the bodice and skirt with silk habotai, leaving the sleeves sheer. So I started by cutting two half circles of white silk. I’ve made many circle, circle and a half, and double circle skirts for belly dancing costumes. So I know two important things about working with half circles. First, they stretch on the bias at the waist. Second, they stretch on the bias at the hem.

Normally I promptly stay stitch near the cut edge of the waist with a short (2.0) stitch to prevent stretching. But, this time I actually wanted a little stretch. I needed the skirt to over lap in front. My plan was to line up the circle skirt center seam with the center back, then stretch the waist edge enough to wrap around the front.

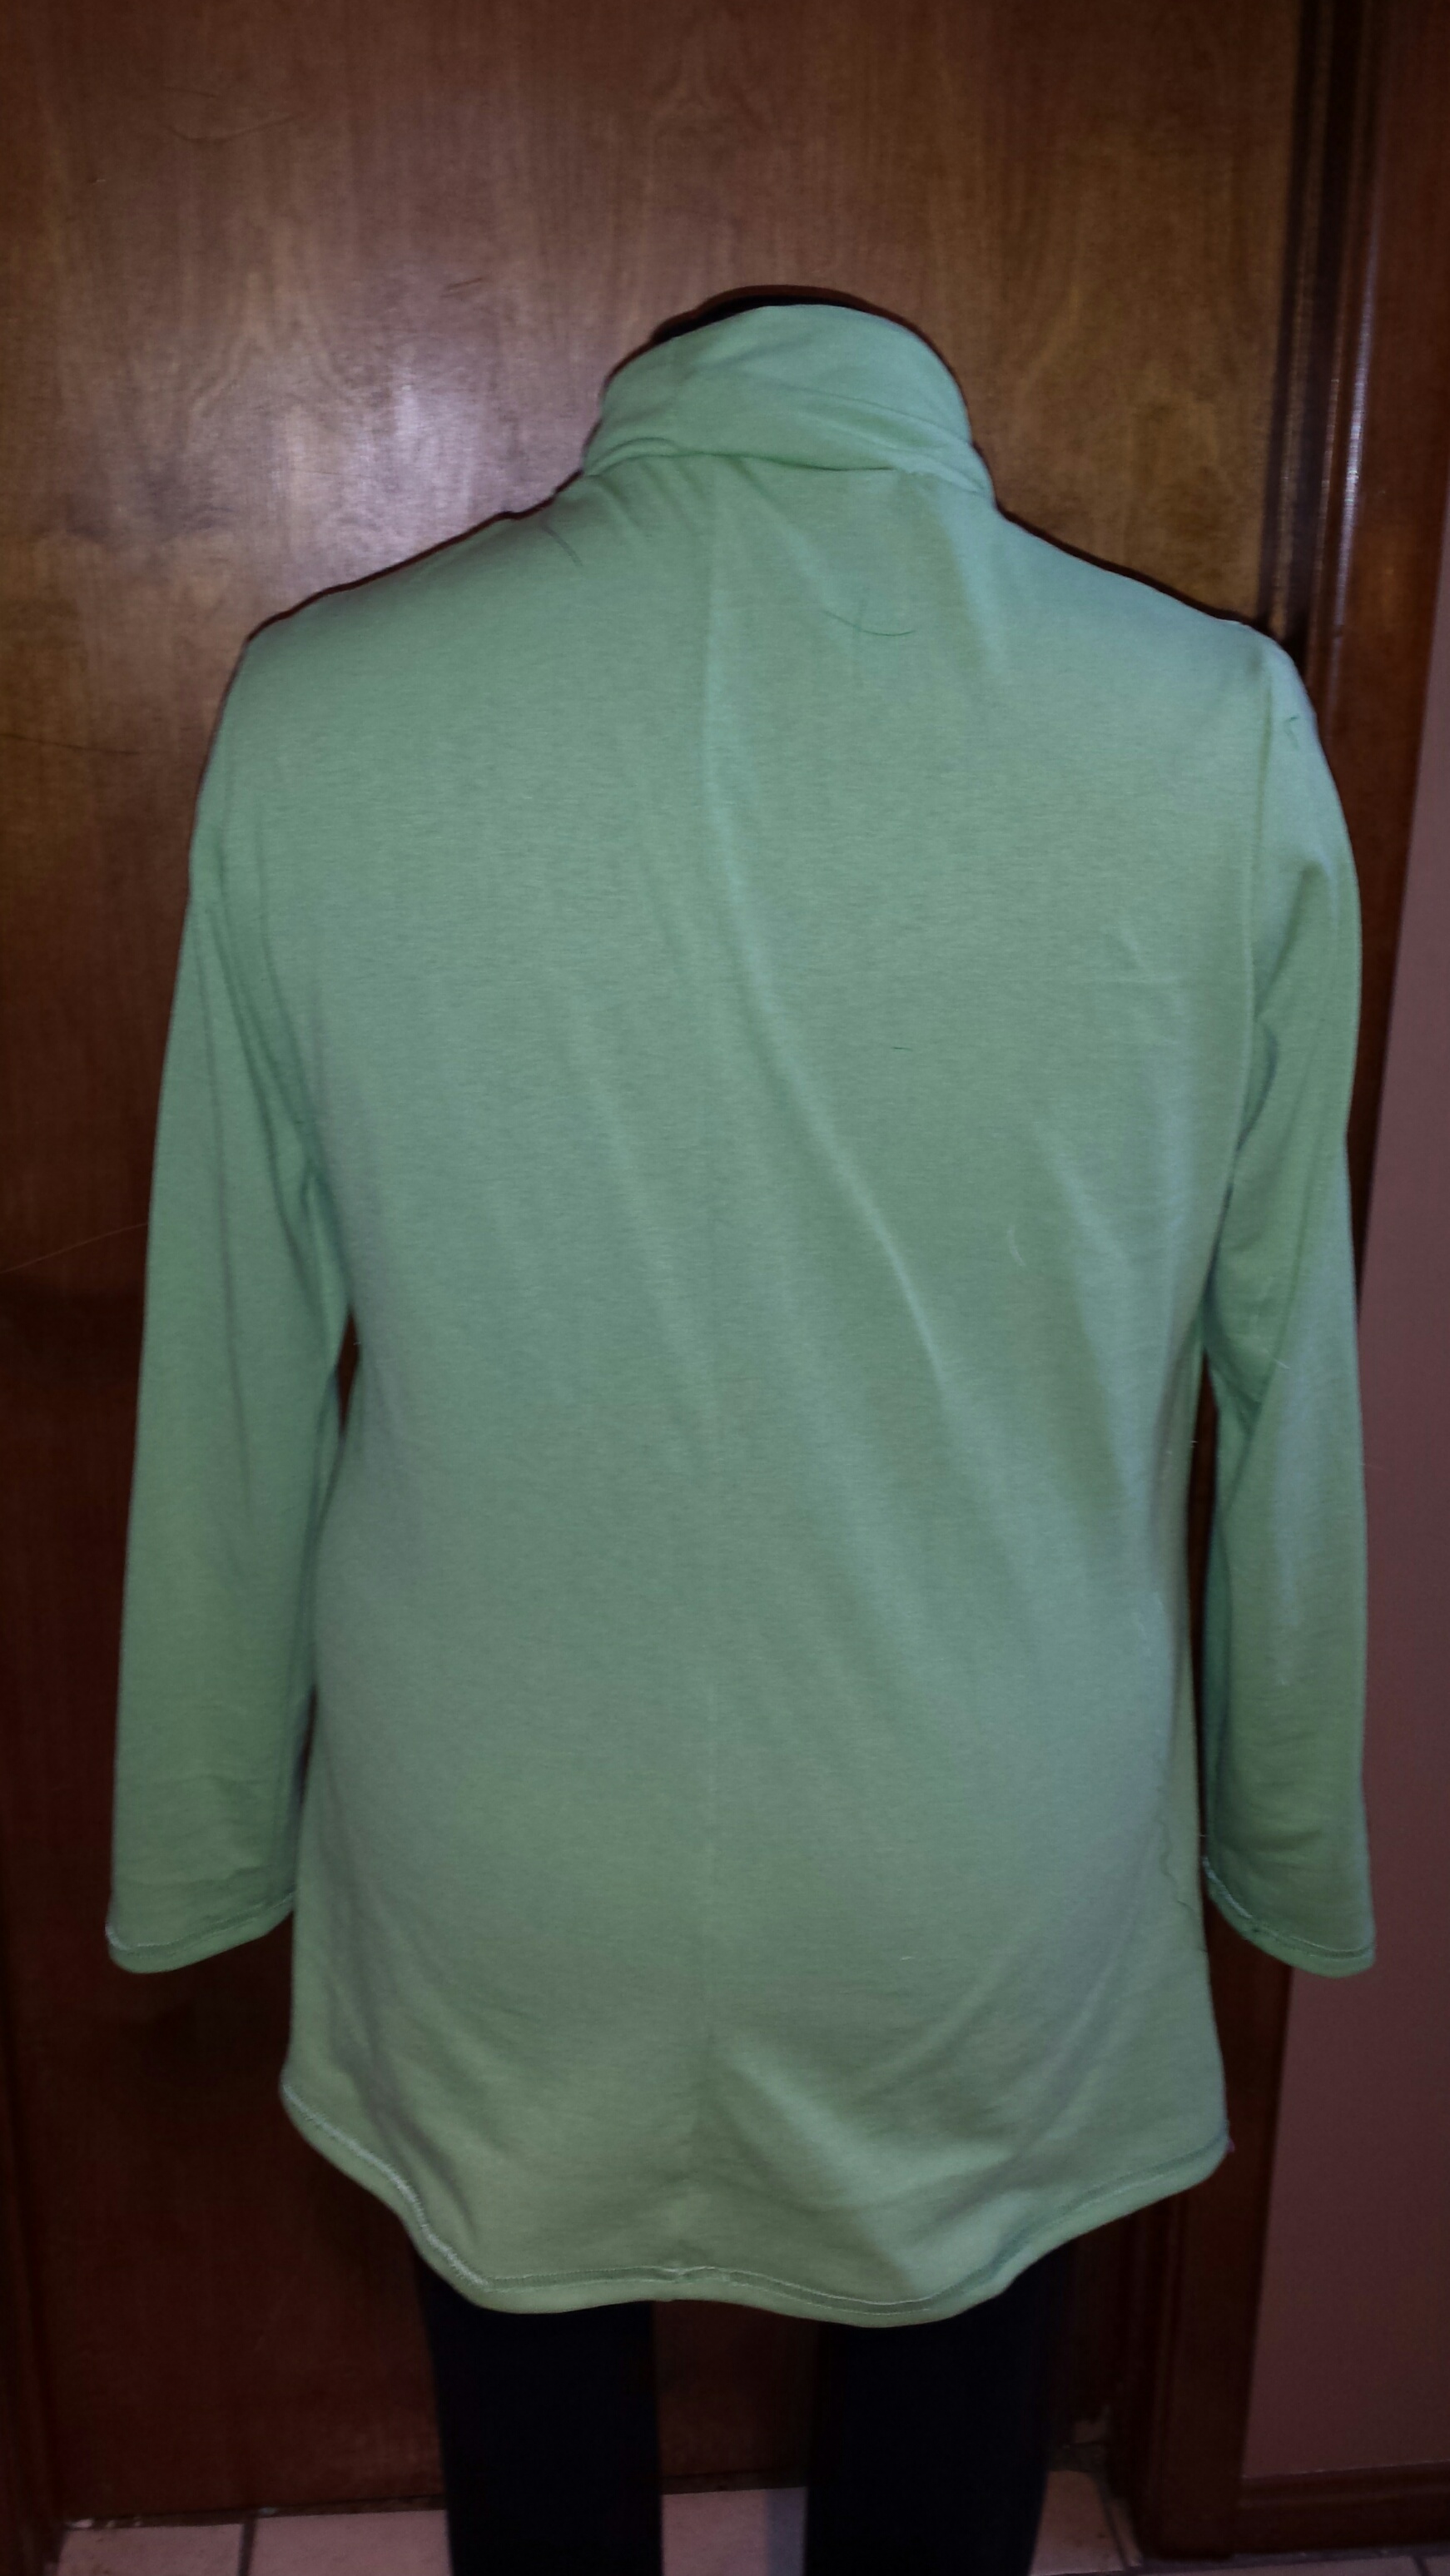
Next I cut the back blouse/bodice, both front pieces, and one test sleeve out of the white silk. Normally I need to do FBA, but there didn’t seem to be an easy way to do it on this pattern. So I ended up messing with the shoulders and armholes instead. This might have been a bad move on my part, but who knows which way would have been best.

I also made it a part faux wrap. I extended the under front piece a few inches, and sewed the raw edge into the side seam. This makes the dress a pullover with a wrap across the front. So even if the worst does happen – the wrap comes out – I’m still covered! LOL!

After quite a bit of tweaking I was satisfied with the fit of the silk bodice. I took it apart and used the bodice pieces and one of the half circles as the pattern pieces for the purple chiffon. The fabric arrived on Monday, we left on Tuesday the following week. Not much time!

I cut the skirt half circles first. French seams would be nice, but, this is the THIRD dress so I’m really pressed for time. So I serged finished the seams and even sewed a few directly on the serger! Two of those seams were the center back seams on the purple chiffon and white silk skirts. I set them to one side.

I tried to get the sleeves out of the scraps from the circle skirt, but the fabric pieces just weren’t big enough. I set the scraps aside to use for the drape and tie pieces.

Next I cut the blouse front and back and sleeves from the remaining fabric. I used up the second 8 yards, and started cutting into my first 3 yard piece. YIKES now I’ll have to order more before it’s gone!

I basted the bodice seams on the machine. When I was satisfied I serged them. I stay stitched along the raw front neck edge, to keep the bias from stretching.

Right about here I was feeling the time crunch. I abandoned the idea of trying to line the dress. But, it was too sheer without something. So the lining pieces became a separate slip.

I cut the facings and ties and two of the front collar drapes. One for the front like the pattern, the second across the back. I applied interfacing to the facings. The pattern calls for a narrow rolled hem on the raw edges of the ties and collar drape.

I used the serger for this step. I used a three thread rolled hem stitch, with gold metallic thread in the loopers and a burgundy metallic in the needle. Later on, when I did the hem, I used a variegated purple embroidery thread in the needle. I wish I had thought of that instead of the burgundy metallic, because all three metallic threads together makes a stiff edge.

Serger tutorials and instruction manuals say to disengage the blade when making a rolled hem. But, I saw one instructor (maybe Angela Wolfe?) leave the blade engaged. It did no harm, and trimmed away tiny whiskers that would otherwise need to be trimmed away by hand.

Because the serger was already set up, I went ahead and finished the exposed edge of the skirt (the edge along the side that wraps around the front) the same way. The unexposed (hidden under the wrap) edge is left with selvedge finish.

I added the front drape collar, then the facings according to the pattern instructions. I sewed the tie ends in place.

Next I attached the skirt to the bodice. It makes more sense to insert the sleeves before attaching the skirt, because the skirt adds a lot of bulk to maneuver around the sewing machine. But I didn’t.

I did not notice that the lower edge of the bodice was NOT cut straight on the grain. This soft silk fabric feels lighter than air when worn, but in fact it does have weight. Enough weight to pull and distort the bodice front. I couldn’t figure out what was going wrong!

When I realized what was happening, I corrected the problem as best I could by stabilizing the waist seam with twill tape. I did the same thing to the slip, but because I had no white twill tape or seam binding, I used tan. Not the prettiest look, but then again, this slip is not my best sewing.

I also added a second tie at the waist to help everything stay in place. To do this, I cut and finished two more tie ends.

But, the waist seam still didn’t look good. I decided to hide it with a narrow self fabric belt, stitched in place at the side seams and front edges. Then I sewed the wide edge of the back drape to the right shoulder, and left it hang free. I can wear it like that, or tuck it into the belt.

Finally it’s time for the sleeves. I sewed the sleeve seams directly on the serger. I machine basted them in place, then finished those seams on the serger.

The last step was to hem the skirt and sleeves. A rolled hem would be nice, but applying a narrow rolled hem to a circle skirt can be a real struggle. So I opted for a different decorative serger finish. I used a wide three thread overlock stitch and a fairly short (less than 1 but more than 0) stitch length. I put variegated purple embroidery thread in the needle and gold metallic thread in the loopers.

Hemming the sleeves was quick and easy. I just put the dress on, marked the desired length with a couple of straight pins, and cut them off a smidge below. Then I finished them on the serger with the decorative stitch.

The bias sections of a circle skirt hem relax over time, making the hem uneven. The ideal way to prevent this is to dampen the skirt (if the fabric can handle it) and let it hang for several days to let the bias relax. I did not have several days. I had overnight, only. So, I hung the dress overnight.

To hem the dress I put Dolly the Dress Form on top of some big plastic bins. Then, I put the dress on her. I was surprised at how crazy the hem was, even though it hung only one night. I found the shortest point of the hem, and carefully snipped the hem up to that length all the way around. I was not super precise, I simply eyeballed it. The fullness of the skirt and the long length will disguise minor wobbles (but big ones will still be obviously visible).  I used the same serged finish on the skirt that I’d used on the sleeves.

Then I finished the slip. I added a waist stay from tan seam binding. I cut the neck opening bigger so it won’t every peek out, even by accident, and finished it with an ordinary 4 thread serger stitch. I put the slip on Dolly. I snipped the hem at what I thought was a few inches shorter than the skirt. I tried the slip on under the dress, and it came out exactly as I hoped, a couple inches shorter than the dress. I finished the hem with an ordinary 4 thread serger stitch.

This dress and slip are so light and airy it’s like wearing a bathrobe!

My only dislike is the tie ends. The single layer of chiffon is kind of thin and limp for this purpose, and the stiff rigid metallic rolled hem I applied doesn’t help. The ties kept untying until I tied them in a knot on top of a bow. Then they stayed nicely in place, but were nearly impossible to untie. I have some long, narrow scraps left from the skirt section. I might remove the current ends from the dress and double them up with a second set of ends cut from the scraps, and finish the edges with the same wide finish I used on the hem, instead of the narrow rolled metallic hem. I might also add hooks and eyes to support the stress of keeping things closed and let the ties be simply decorative.

If I make this top again I will try to do a regular FBA.

<b>Pattern Description: </b>
Wrap top with optional draped collar and sleeve choices

<b>Pattern Sizing:</b>
Misses

<b>Did it look like the photo/drawing on the pattern envelope once you were done sewing with it?</b>
I made changes, so not so much

<b>Were the instructions easy to follow?</b>
Yes

<b>What did you particularly like or dislike about the pattern?</b>
Like the wrap

<b>Fabric Used:</b>
Silk burn out chiffon

<b>Pattern alterations or any design changes you made:</b>
Added a circle skirt, extra tie at the dropped waist, and a back drape

<b>Would you sew it again? Would you recommend it to others?</b>
I might, but as a top not as a dress. Yes I recommend it

Leave a comment

Filed under sewing

Gods and Kings : The Rise and Fall of Alexander McQueen and John Galliano

Time for another book review! This time it’s the dual biography of Alexander McQueen and John Galliano, by Dana Thomas

You might like this book if

  • You enjoy biographies
  • You are interested in a behind the scenes look at the fashion industry

The lives of John Galliano and Alexander McQueen share obvious parallels. Both were gifted designers who struggled with addictions and broken relationships. But they were different people with different personalities and visions. They both came from poor families, but from very different cultural backgrounds. They attended the same design school but took very different paths through fashion. Galliano was a fashion illustrator, McQueen was a Saville Row tailor.

The Introduction begins in a cafe, where an unidentified man erupts in an anti-semitic tirade. This man is John Galliano, under the influence of heavy medication. The time is almost one year to the day after his compatriot, Alexander McQueen, committed suicide. The parallel is obvious. McQueen ended his physical life. Galliano ended his career life.

The first three chapters dive into Galliano’s life, starting with his early childhood on the Mediterranean. His experiences here would often influence his work throughout his life. The story follows his life as he moves to London, his education at the design school, and his final school project, “Fallen Angels”. It continues through the early part of his career and alcohol abuse. McQueen’s early life, through his “Jack the Ripper Stalks his Victims” collection is covered in a single chapter.

From here on out, the book bounces back and forth, sometimes almost frantically, between Galliano and McQueen. The story follows them through groundbreaking fashion collections and collapsed businesses, collaborations with benefactors and broken personal relationships, and struggles with substance abuse. The parallels in their lives are obvious, so the book focuses on their differences.

Another recurring theme is the transformation of couture and luxury fashion by the Arnault family, Instagram, and fast fashion.

In later chapters, the book swerves a bit from the typical third person overview to the authors perspective through her personal experiences at shows by, and contact with, both men.

The collections and shows presented by McQueen and Galliano through the years are described in vivid detail. Photos of some of their signature garments appear in the 16 pages of photos in the book, along with photos of both men. One particularly memorable photo is a shot from a McQueen show, with the robotic arm spraying paint onto a model in a white dress.

Alexander McQueen committed suicide on February 11, 2010. But his label continues on. Perhaps the brands most famous moment was when Kate Middleton wore a McQueen wedding dress for her marriage to Prince William on April 29, 2011.

John Galliano also continued on, eventually becoming creative director for Maison Martin Margiela in 2014.

And that’s where the book ends, because it was printed in 2015.

FWIW in 2018 Galliano released his first perfume for Maison Margiela, called Mutiny. Alexander McQueen is gone forever. But, John Galliano and his career continue on.

Leave a comment

Filed under book review

China Chic – East Meets West Book Review

China Chic – East Meets West by Valerie Steele and John S Major

<b>Book Index/Chapter headings</b>

Foreword

Notes on the Contributors

The Principal Dynasties of China

Introduction and Acknowledgements

Part 1

1: Decoding Dragons: Clothing and Chinese Identity

2: From Foot Binding to Modern Fashion

3: Fashion Revolution: The Maoist Uniform

4: China Chic: East Meets West

Part 2

5: Our Women are Acting like Foreigners Wives

6: Military Culture and Chinese Dress in the Early Twentieth Century

7: A Woman has so Many Parts to her Body, Life is Very Hard Indeed

8: Jazzing into Modernity: High Heels, Platforms and Lotus Shoes

9: The Cheongsam: Issues of Fashion and Cultural Identity

10: Dress and the Cultural Revolution

Notes

Selected Bibliography

Index

<b>PaperBack or HardBound?</b>

Hardbound

<b>Does this book have clear illustrations or photographs?</b>

Yes, this book has loads of wonderful illustrations and photographs.

<b>Would you recommend this book as a MUST HAVE?</b>

No

China Chic studies the history of Chinese clothing, with an emphasis on the dramatic changes of the 20th century. It examines at the role fashion and clothing have played in Chinese history, looks at designs produced by modern Chinese designers, and the influence Chinese style has had on Western designers.

This is NOT a sewing or how-to book.

You might like this book if

-You enjoy history and fashion history

-You are interested in authentic Chinese period clothing

China Chic s divided into two parts. The first part is written by the authors. The second is a collection of scholarly essays written by others.

China is a vast and ancient country and encompasses hundred of different ethnic groups and cultures. Most minority groups are confined to small areas and under heavy influence from the cultures ruling over them, so the focus is on the ethnic groups who ruled, from the Chinese (Qin Dynasty), to the Mongols, then Manchurians. After the end of the Qing Dynasty and Imperial China, the primary influence on fashion, and everything else, was communism personified by Chairman Mao until just a few short decades ago.

Usually, the Introduction and Acknowledgements do little more than introduce the subject and thank the people who helped make the book possible. They do that here, too, but this chapter also includes fabulous photos that should not be overlooked. These images include a wonderful old photo of a husband and wife in traditional Chinese clothing.

The first chapter, Decoding Dragons, examines key elements of Chinese culture and fashion. It traces their roots from ancient writings to the creation of the cheongsam in the early 20th century. The symbolism of dragons, the significance of Yellow, and the status (or stigma) of robes that button on the right (or left) all leave a significant mark on Chinese fashion. Westerners sometimes mistakenly assume Chinese fashion was frozen and static for thousands of years. While Chinese fashion did stay within a framework based on robes and pants and skirts, the styles within the framework changed constantly over time. What doesn’t seem to change, based on quotations from all eras of Chinese history,  is the complaints of older generations about the fashion tastes of the young!

The second chapter, From Foot Binding to Modern Fashion, studies the history and significance of foot binding. Only ethnic Chinese women had bound feet. The process was not always welcomed, the Manchus tried to ban foot binding in the mid 1600s. Chinese women of all income levels, not just wealthy, had bound feet. The Empress Dowager Cixi, who ruled in the 19th century, did not have bound feet because she was not Chinese.  The Qing dynasty came to an end in the 20th century, and foot binding followed, though it persisted to some degree in rural areas for a few more decades.

The third chapter, Fashion Revolution: The Maoist Uniform talks about clothing in the communist era. In this chapter we learn the Mao Uniform was actually created by the first president of the Chinese Republic, Sun Yat-sen. His name, Sun Yat-sen, is the Chinese name for the outfit. Mao himself never mentioned clothing or fashion after becoming Chairman, the society he created enforced adherence to the Sun Yat-sen suit.

After the death of Chairman Mao in the mid 1970s, fashion slowly began to seep back into everyday Chinese life. When I visited China in 2004, everyone in Shanghai was dressed in fashionable Western clothing. In a quaint fishing village outside Shanghai, we saw locals wearing parts of Sun Yat-sen suits mixed with Western clothing, Sun Yat-sen jackets with jeans, or the pants with T-Shirts.  In Tiananmen Square in Beijing, guides offering tours stood on the corner, almost all in Western dress. We hired a friendly older woman in a Sun Yat-sen suit. She told us she wore the suits because they were comfortable, sturdy and economical. It was also a shrewd marketing move. She sold more tours wearing the Sun Yat-sen suit that she did wearing Western dress.

The fourth, and last chapter in Part One, East Meets West, looks at the re-emergence of Chinese fashion after the opening of the Bamboo Curtain. It begins with an extensive discussion of the Western perception of the East as exoic and decadent. This is not a new idea. The Roman Empire and Han Dynasty conducted robust trade, and the Western Romans perceived China as a rich, exotic place of silks and spices. But, during the Opium Wars negative Asian stereotypes emerged. Sadly, these unfortunate and inaccurate images dominated popular culture and persisted for decades.

Finally, the discussion turns to fashion, including more wonderful photos and drawings. Early in the chapter are photos of gorgeous 1920s gowns with Chinese motifs and design elements. They are followed by more beautiful photos of garments from the 1990s. First is a gallery of clothing created by Western designers with Chinese influences. Then come examples from Chinese designers Vivienne Tam, Yeohlee, Han Feng and Amy Chan. One dress from Anna Sui, a first generation Chinese American, is included.

Part 2 is a collection of six essays on aspects of Chinese fashion. All the topics are covered in Part One. Each of these essays dives deeper into a particular subject, taking a closer look from political and cultural viewpoints, as well as the historical viewpoint covered in Part One.


Leave a comment

Filed under book review

Comfy PJs and Ankle Socks/Leg Warmers

These comfy pjs are made from the stash. I used one piece of floral cotton/lycra jersey, a leftover piece of cotton rib knit, and a few scraps of lavender cotton thermal knit. In the photo, one leg of the sleep shorts is folded up to show the floral cuff/lining. One of the purple ankle socks is pulled onto one sleeve.

I made a pair of shorts with the stone blue rib knit a few years ago. The fabric is soft and strong, stretchy with excellent recovery. I wish I had more!

Sometimes when I draft a pattern piece I leave it with the pattern I used with it. Other times, I stuff the piece into a big envelope with other miscellaneous pieces. The front and back for this tee came out of that envelope. I don’t remember why I made them. I pulled a full length sleeve piece out of the same envelope. I think it is the starting point for my experiments with leg-o-mutton sleeves.  To shorten it I simply folded the end up.

I sewed the whole thing on the serger — WITHOUT machine basting first!! Wow I was brave!! LOL! In fact, I did not use my regular machine AT ALL on this tee! I even sewed and applied the rib neck band on my Enlighten, and coverstitched the hem and sleeves with my Evolve.

My bravery did not extend to the sleep shorts. I used my basic slim fit pattern that is the Style Arc crotch modified with the Fit Nice System. I made them just below knee length. I had a little bit of floral knit left, so I cut cuffs to line the inside of the bottom of each leg. To show off the floral, I left the side seams open about 4″ at the bottom of the leg. I slipped the floral over the bottom of the leg, sewed along the side seam opening, along the bottom, then up the other side of the open side seam. After clipping the seam allowance at the corners I flipped the floral band to the inside, finishing the hem and open side seam.

Last were the ankle socks. I like ankle sock. They are just a tube of purple scraps, with a narrow floral band at the bottom and a blue rib band at the top. My original plan was to use the floral on both, but it wasn’t stretchy enough to be comfortable at the top of the sock, so I substituted a narrow band of the ribbing instead.

The second photo is the inside of the short leg, with the cuff lining pinned in place.

<b>Pattern Description: </b>
Summer pjs. Oversized tee with neckband, below the knee (is that peddle pusher length?) sleep shorts with decorative cuff lining, leg warmers

<b>Pattern Sizing:</b>
Mine! To me.

<b>Did it look like the photo/drawing on the pattern envelope once you were done sewing with it?</b>
Everything looks as I expected it to

<b>Were the instructions easy to follow?</b>
No instructions.

<b>What did you particularly like or dislike about the pattern?</b>
Sized to me!

<b>Fabric Used:</b>
Tee is cotton/lycra jersey from Fabric Mart. Shorts are cotton rib knit, leftover from a pair of daytime shorts. The purple thermal knit is just scraps.

<b>Pattern alterations or any design changes you made:</b>
The sleeve was long, I just folded it to cut it short.

<b>Would you sew it again? Would you recommend it to others?</b>
Yes, I’ll be making more pjs!

Leave a comment

Filed under sewing

Two Pairs of Self Drafted Leggings

Both of these are based on a combination of the crotch from Style Arc Elle pant, tweaked with the process from the Fit Nice Pants drafting system.

One pair is a floral crepe, the other is navy ponte. The floral is fun, but I only have a couple of tops that go well with it colorwise. I needed more and had a coordinating solid knit fabric, but I didn’t want a plain old T, so I used an old favorite, Simplicity 1716. But, that top is the topic of a different post.

Both leggings boast extra length, so they naturally bunch up around the ankle.

I cut the ponte pair out first. I sewed it up on the machine with a narrow zig zag stitch, and tried it on. I realized, with slight horror, that I had omitted the seam allowance on the outside edge! Luckily, the seams I sewed up had a 5/8″+ allowance. I was able to gain the extra space I needed by reducing the seam allowances to a narrow 3/8″. I knew letting out the inseam was useless, as that would add width to the legs only, when I needed width across the rear.  Reducing the side seam allowances from 5/8″ to 3/” added 1/2″ to the leggings. Letting out the front and back crotch seams added another 1/2″. That 1″ difference made all the difference in the world.  As in, the difference between Trashed and Success!

I promptly marked Add Seam Allowance to the pattern pieces.

I sewed the leggings up on the serger. I tried them on, and cut the waist down

Then I cut the floral leggings, accidentally adding extra seam allowance to the front crotch.

Lucky for me taking in a seam is easy peasy! Double lucky, because I didn’t take the time to machine stitch the floral leggings. Thinking I had accounted for everything when I tested the navy ponte pair, I brazenly sewed the side, inseam and crotch seams on the floral leggings directly on the serger! It only took a few seconds to take the front crotch seam in on the machine with a narrow zig zag.

<b>Pattern Description: </b>
Pants pattern made from the Style Arc crotch, tweaked to fit with the Fit Nice System

<b>Pattern Sizing:</b>
Just for me!

<b>Did it look like the photo/drawing on the pattern envelope once you were done sewing with it?</b>
No drawing, but hey, I’ve seen leggings before

<b>Were the instructions easy to follow?</b>
No instructions

<b>What did you particularly like or dislike about the pattern?</b>
It fits me!

<b>Fabric Used:</b>
Ponte knit and crepe knit

<b>Pattern alterations or any design changes you made:</b>
Well, it is tailored to me

<b>Would you sew it again? Would you recommend it to others?</b>
Yep I’ll be sewing it again. I totally recommend the Fit Nice System and the Style Arc crotch. But, crotch shape is so personal. Each body is different.


Leave a comment

Filed under sewing

Simplicity 1716 Yet Again

This Simplicity OOP pattern is one of my go-to favorites. I’ve made it tunic length in large floral prints with long and short sleeves, tunic length in horizontal stripes with 3/4 sleeves, and knee length in an abstract tropical-ish print with 3/4 sleeves.

This time, it’s in a solid cotton jersey. I made this top to go with my floral leggings, because I have few other tops that go well with the floral print. The fabric is a little on the stiff side, and has poor recovery. Fortunately, it’s also on the firm side, so unlikely to stretch out of shape anyway.

The first time I made this pattern I cut the largest size in the envelope and was mostly pleased with the fit. On the next make, I did a sort of FBA by extending the two front bands by about 2″ each, added 1″ to the center front and 1/2″ to each side.

My first assembly step was serging the sleeve seams. I’m usually afraid to just sew on the serger. One wrong wiggle and the material could be hopelessly sliced. And if it’s sewn wrong, picking apart the seam is somewhere in between miserable and impossible. But the under arm seam on a sleeve is as safe as they come. Sometimes that seam might need to be brought in more, but it’s impossible to let out much once cut. So it’s a serger-safe seam.

After that, I followed the instructions, except I omitted the elastic in the back collar. I sewed the seams on the machine with a narrow zigzag stitch, then finished the seams on the serger.

I did a reverse coverstitch on the hem and sleeves. I used green variegated serger thread in coverstitch needles 1 & 3, and embroidery thread in the looper.

<b>Pattern Description: </b>
Misses pullover knit tops. Front twist collar or cowl neck with ruched side seams. Choice of sleeve lengths

<b>Pattern Sizing:</b>
Misses

<b>Did it look like the photo/drawing on the pattern envelope once you were done sewing with it?</b>
Yes

<b>Were the instructions easy to follow?</b>
Yes, the instructions are clear and accurate

<b>What did you particularly like or dislike about the pattern?</b>
I really really like this pattern! I’ve made both the cowl neck version and the twisted front version. The twisted front is my favorite.

<b>Fabric Used:</b>
Cotton jersey

<b>Pattern alterations or any design changes you made:</b>
I do an FBA on this pattern by adding a couple of inches to the horizontal bands at the bust, and a bit to the lower front width

<b>Would you sew it again? Would you recommend it to others?</b>
Yes and Yes

Leave a comment

Filed under sewing

McCalls 2501 – Empire Dress in Lace 1999

I have a strange relationship with sewing patterns. I know my compulsion to collect them is ordinary. The weird thing is this: When I see the new releases from The Major pattern company (now that CSS owns them all), I always see a couple of cute things I like. But, when I’m looking for something specific, it’s nowhere to be found. Not from a CSS company, not from an Indie. So I turn to Etsy and Ebay and search OOP patterns.

And that’s how I came to this simple empire waist dress pattern, copyright 1999. It is exactly what I want EXCEPT for the Megan Markle boat neck. Overall, this pattern is remarkably current despite being 20 years old. And that’s the other weird thing! Often a sewing pattern for the most current, contemporary, trending-now look is OOP for several years. Maybe they need a fashion forecaster?

My inspiration for this simple dress was a D&G fitted lace sheath. Snugly fitted sheaths with waist seams are not very flattering on me, so I chose an empire style instead. The D&G lace has large floral bouquets on a white background with lots of white space. Mine is abstract blue and pink roses piled on top of one another in twisting columns, with bits of cream and green leaves. The D&G dress has a beautiful scallop neckline I’d love to duplicate.

The lace I chose is a crochet like knit, with a soft hand and plenty of stretch. It is kind of open and a little bit see through, but not a lot.  A serged finished seam is not easily visible from the right side. I’m happy about that because it means I can serge finish instead of fussing with French seams or such. But, it’s still too sheer to use without a lining or underlining or something, because I  prefer my body more covered. Plus, this pattern is designed for woven fabrics with some body. This lace by itself is far too soft, drippy and stretchy to work.

I dug through my stash to find a suitable lining. The possibilities included a piece of turquoise polyester “China Silk”; a piece of light blue rayon ponte leftover from another project, stone blue polyester crepe, vivid pink poly/rayon ponte, or bright blue poly/rayon ponte. Each one had a different effect under the lace. I chose the light blue ponte, mostly to use it up, but the piece was just about 1/4 yard too small, and I didn’t feel like piecing to make it fit. The crepe was a bit too bland and the turquoise fabric was just too different from the lace to work well.

A good ponte will work for most patterns designed for wovens. The brilliant blue adds life to the lace, and I’m not sure where else I’d use a blue this bright. It, like the floral crochet lace and vivid pink ponte, came from Fabric Mart. I didn’t like the pink under the lace nearly as much as the blue, although the pink is even more, well, it’s really pink and I have no idea how I’ll use it!

This pattern only goes up to a size 18, and I have  a full bust and thick waist. So I did a FBA, adding a side dart. Normally, the vertical slice in the bodice pattern would go right through the center of the vertical underbust dart, so the fullness added to the bust is easily removed at the waist. But, I needed fullness at the waist, too! To get the fullness at the waist, too, I did a FWA (Full Waist adjustment) by moving my vertical slash closer to the center front, and slashed and spread the skirt to match the added fullness. Basically, I did an FBA all the way down.

I cut the dress in ponte first, and sewed it on the machine with a very narrow zig zag stitch in white thread. Yep, I knew I was going to be undoing some of those stitches! I made the bodice first. Because both ponte and lace are stretchy, I decided to omit the back zipper. I needed to tweak the bust darts, both side and vertical underbust, just a little bit.

Then, I made the ponte skirt on the machine with narrow zig zag, and tried it on. It fit great. I pinned it to the bodice and tried it on again. I liked the way everything fit. So I transferred the little tweaks I’d made to the darts back to the pattern. Finally I finished the bodice and skirt seams on the serger (but I did not attach them together).

Next, I cut the bodice, skirt and sleeves out of lace. I sewed all the darts in the bodice and assembled it, using the machine and a narrow zig zag stitch. I put the lace bodice over the ponte bodice and tried it on. It looked good. I worried about the bulk from the darts, especially those big horizontal FBA darts, so I used a serger to remove the dart intake on all the bodice darts on the lace bodice.

It made a difference on the big FBA darts, but not much on the verticals. So I didn’t bother to serge the skirt darts. I did serge finished the vertical seams in the lace bodice and skirt.

With the lace bodice over the ponte bodice and the lace skirt over the ponte skirt, I pinned the bodice to the skirt and tried it on. Looks good! The next step was sewing the seam with a narrow zig zag on the machine (just in case I need to mess with it later).

Next, I turned my attention to the sleeves. My original plan was short sleeves, but for whatever reason, I cut long sleeves. I serged the sleeve seam, this is one of the few seams I’m brave enough to sew directly on the serger without machine basting.

Inspiration Dress

Next, I pinned the sleeves into the armholes. They fit easily and smoothly. But, they were a little baggy at the wrist, so I took the sleeve seam in a lot at the wrist, tapering off to nothing around the elbow.

I zig zagged the sleeves into place, tried it on, then serge finished the seam.

When I cut the neckline, I cut it as small as possible. I tried to cut it into scallops, but it just turned into a mess. Yikes!! So, I cut the neck a bit lower, went to Ebay, and ordered two different lace collars to cover the mess. I also ordered some fringy lace, in case I need to add extra lace somewhere to make the added on lace collar look intentional.

The collar arrived. I redid the neck in a simple swoop. Then I stitched the edge of the lace collar to the edge of the neckline. But, they were slightly different shapes, and the lace collar did not want to lay flat! So, I took a pair of tiny scissors and started snipping connecting threads, until the collar lay flat when the dress is on my body. The collar still will not lay flat when the dress is on a hanger.

I decided to not omit the lace at the bottom. I used my Evolve to coverstitch the hem and sleeve edges. Unfortunately, I got some tunneling on the hem. I may not have time to rip and resew the hem before my trip, but eventually that’s what I plan to do

<b>Pattern Description: </b>
Sheath dress with bateau neckline, empire waist, front and back darts, back zipper and skirt vent, choice of three sleeve lengths or sleeveless

<b>Pattern Sizing:</b>
Misses

<b>Did it look like the photo/drawing on the pattern envelope once you were done sewing with it?</b>
Yes, it did

<b>Were the instructions easy to follow?</b>
Yes, they were accurate and easy to follow. All the notches lined up — except where I messed with the pattern for FBA etc

<b>What did you particularly like or dislike about the pattern?</b>
I like the simple sheath line with the empire waist. I do NOT like the Megan Markle neckline

<b>Fabric Used:</b>
Printed floral cotton lace over a rayon blend ponte for modesty

<b>Pattern alterations or any design changes you made:</b>
Recut the neckline into a more jewel shape. Did a FBA/FWA (full waist adjustment) .

<b>Would you sew it again? Would you recommend it to others?</b>
Yes and yes! I really like this dress (except for that neckline).

Leave a comment

Filed under sewing