Monthly Archives: February 2019

Lekala 4219 in a Pear Print with Black Lace

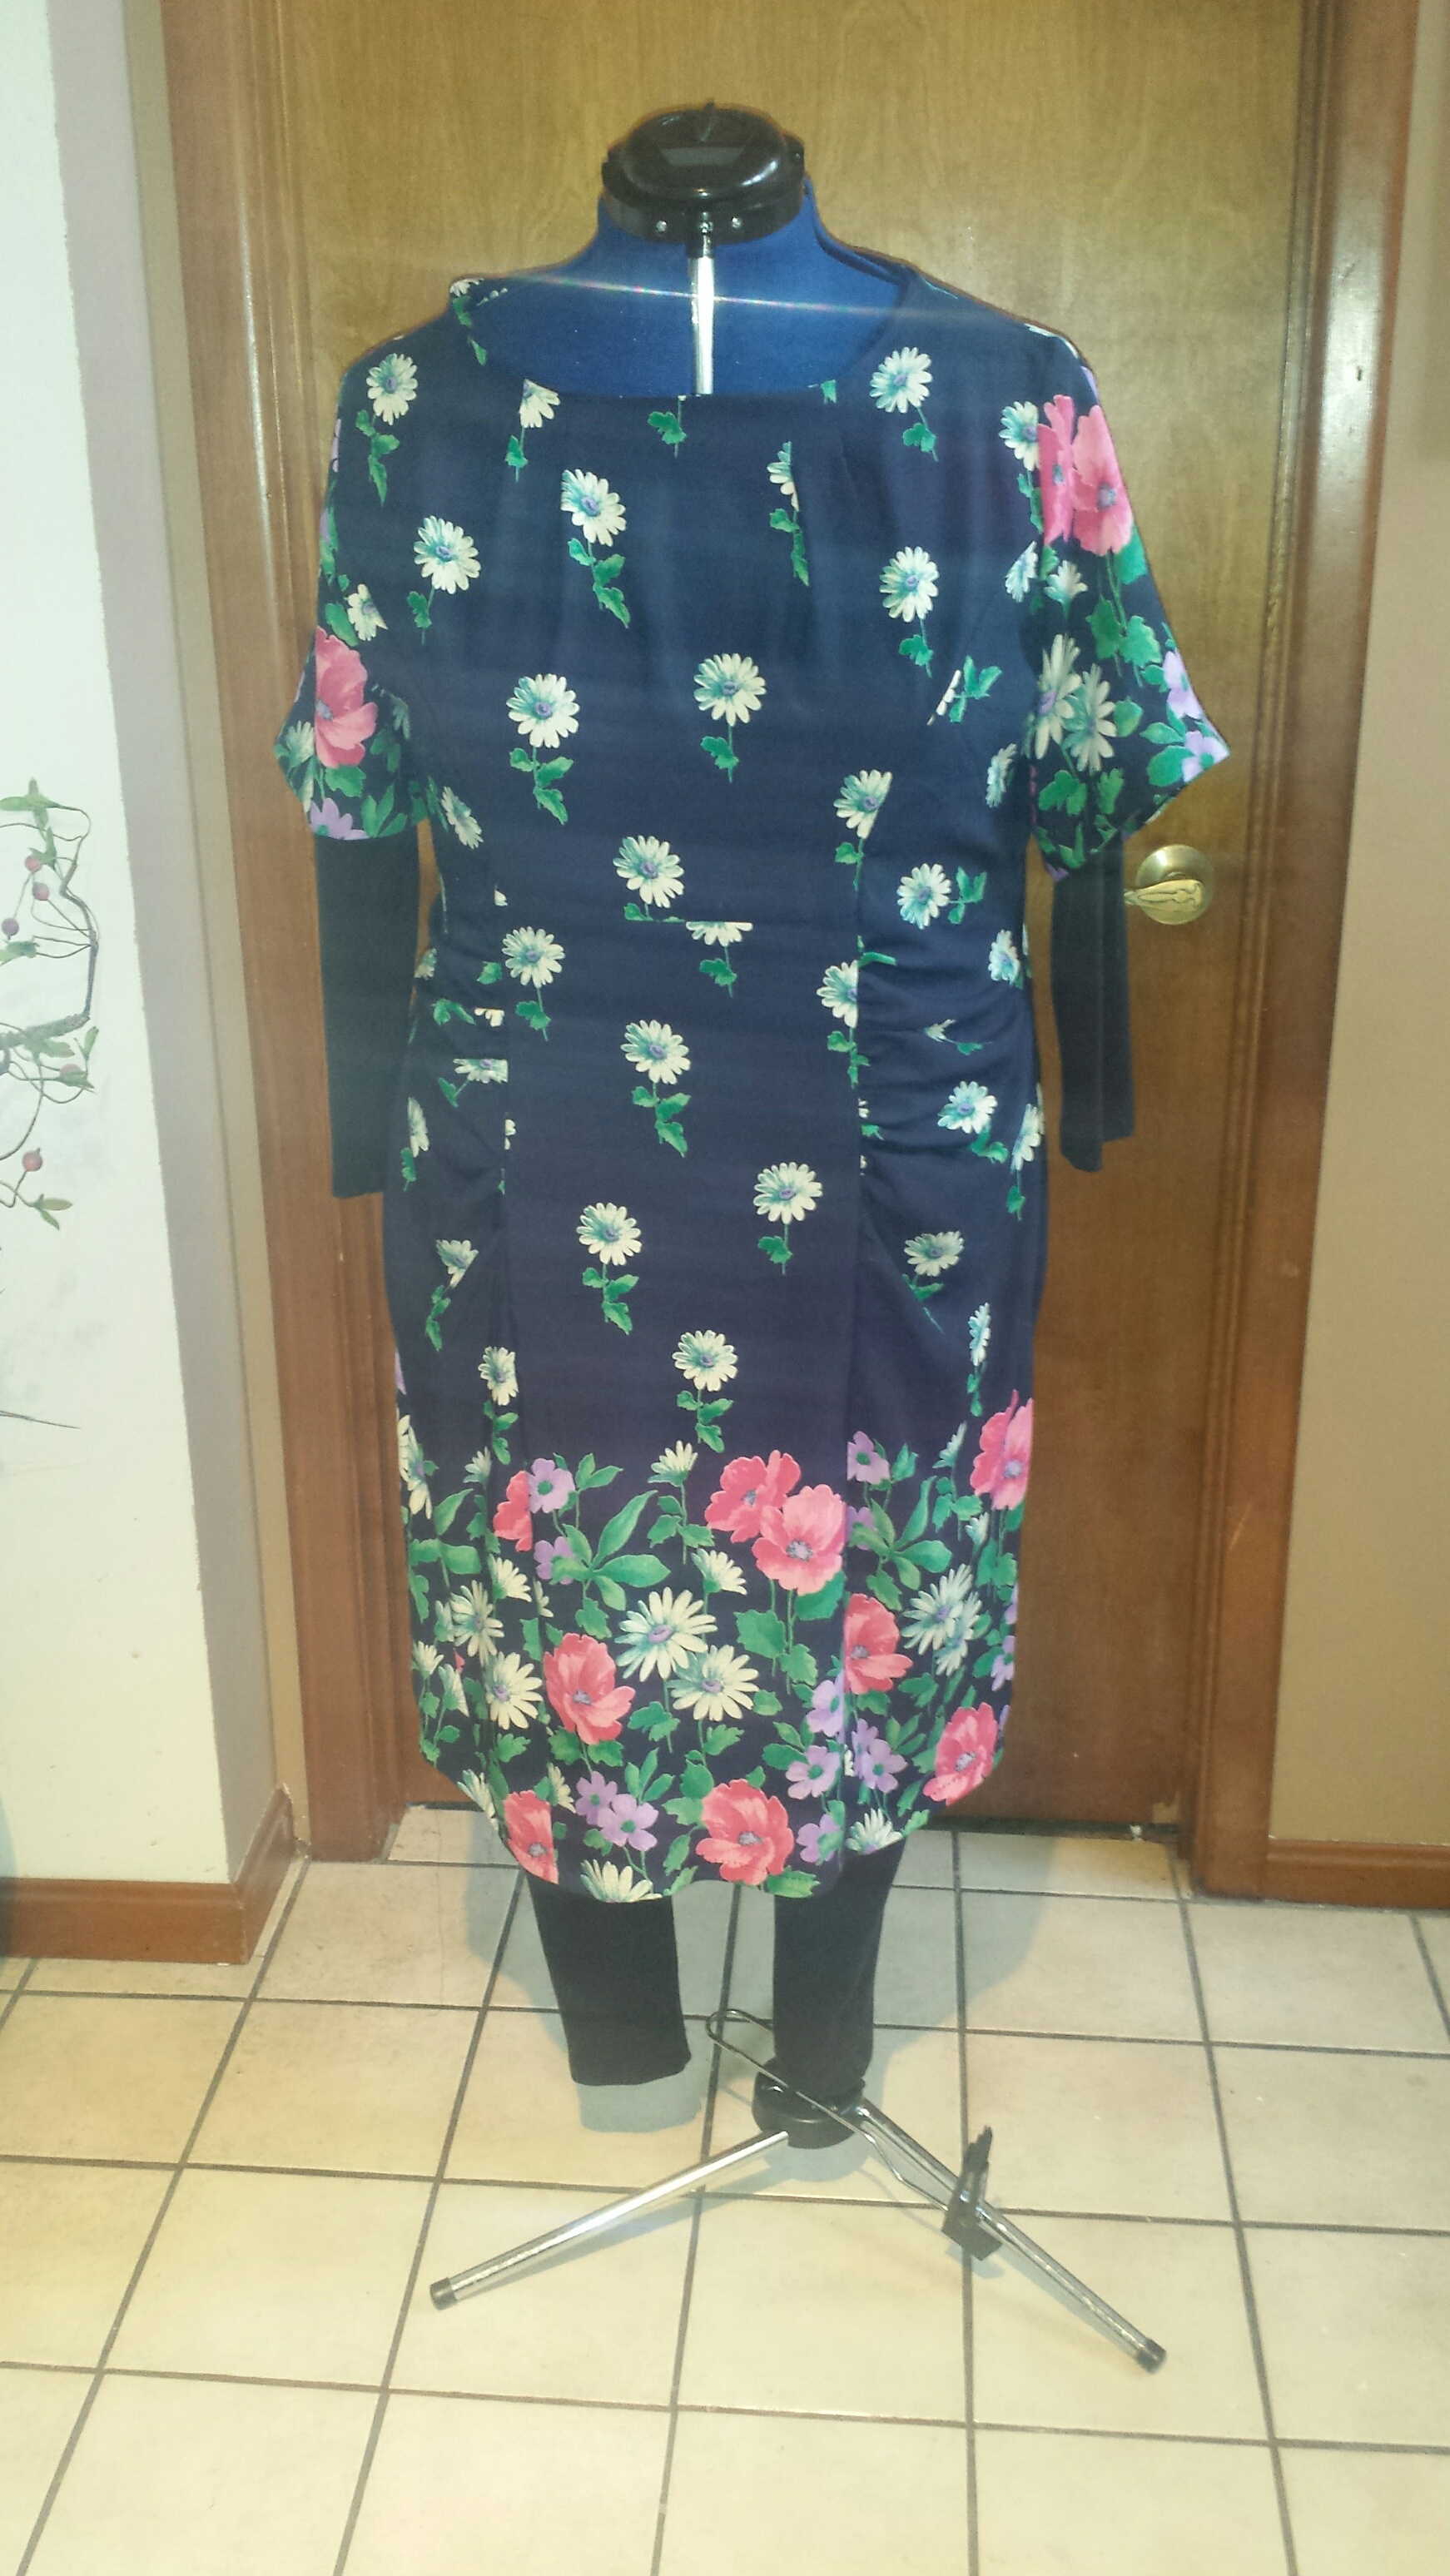
This cute dress has princess seams, a v-shaped raglan neckline, and an upside down v-shaped insert at the waist.

Lekala patterns are custom printed to your measurements. Usually the result is a really nice fitting garment. But, it’s not a foolproof system. Sometimes the designs are intentionally snug – way to snug for my taste and comfort. and sometimes I still need to fba. This dress is one that fit fine with very little tweaking.

I made this dress before from a boucle. The boucle v stretched out of shape, as did the bias edges where the v is inserted. Last time it was a nightmarish mess. I ended up removing the insert, then cutting, interfacing and installing a new one. This time, I interfaced a chunk of fabric before cutting out the v, and I reinforced the bias edges with fusible interfacing to prevent stretching.

I used a polyester pear print fabric, I think it came from Etsy. I accented the v neck and insert with black lace, and added a flounce edged in black lace. I added the flounce because I wanted a little flare at the bottom, but was afraid to build that fullness into the skirt pieces themselves. I didn’t want an obvious ruffle, either. So the easy solution was a flounce. I stole the flounce piece from another skirt pattern (Simplicity or McCalls, can’t remember which!).

The dress went together easily. Much much easier than my first make. I’m glad I learned from my mistake, and interfaced and reinforced the v insert and bias edges. That one simple step made everything go so smoothly!

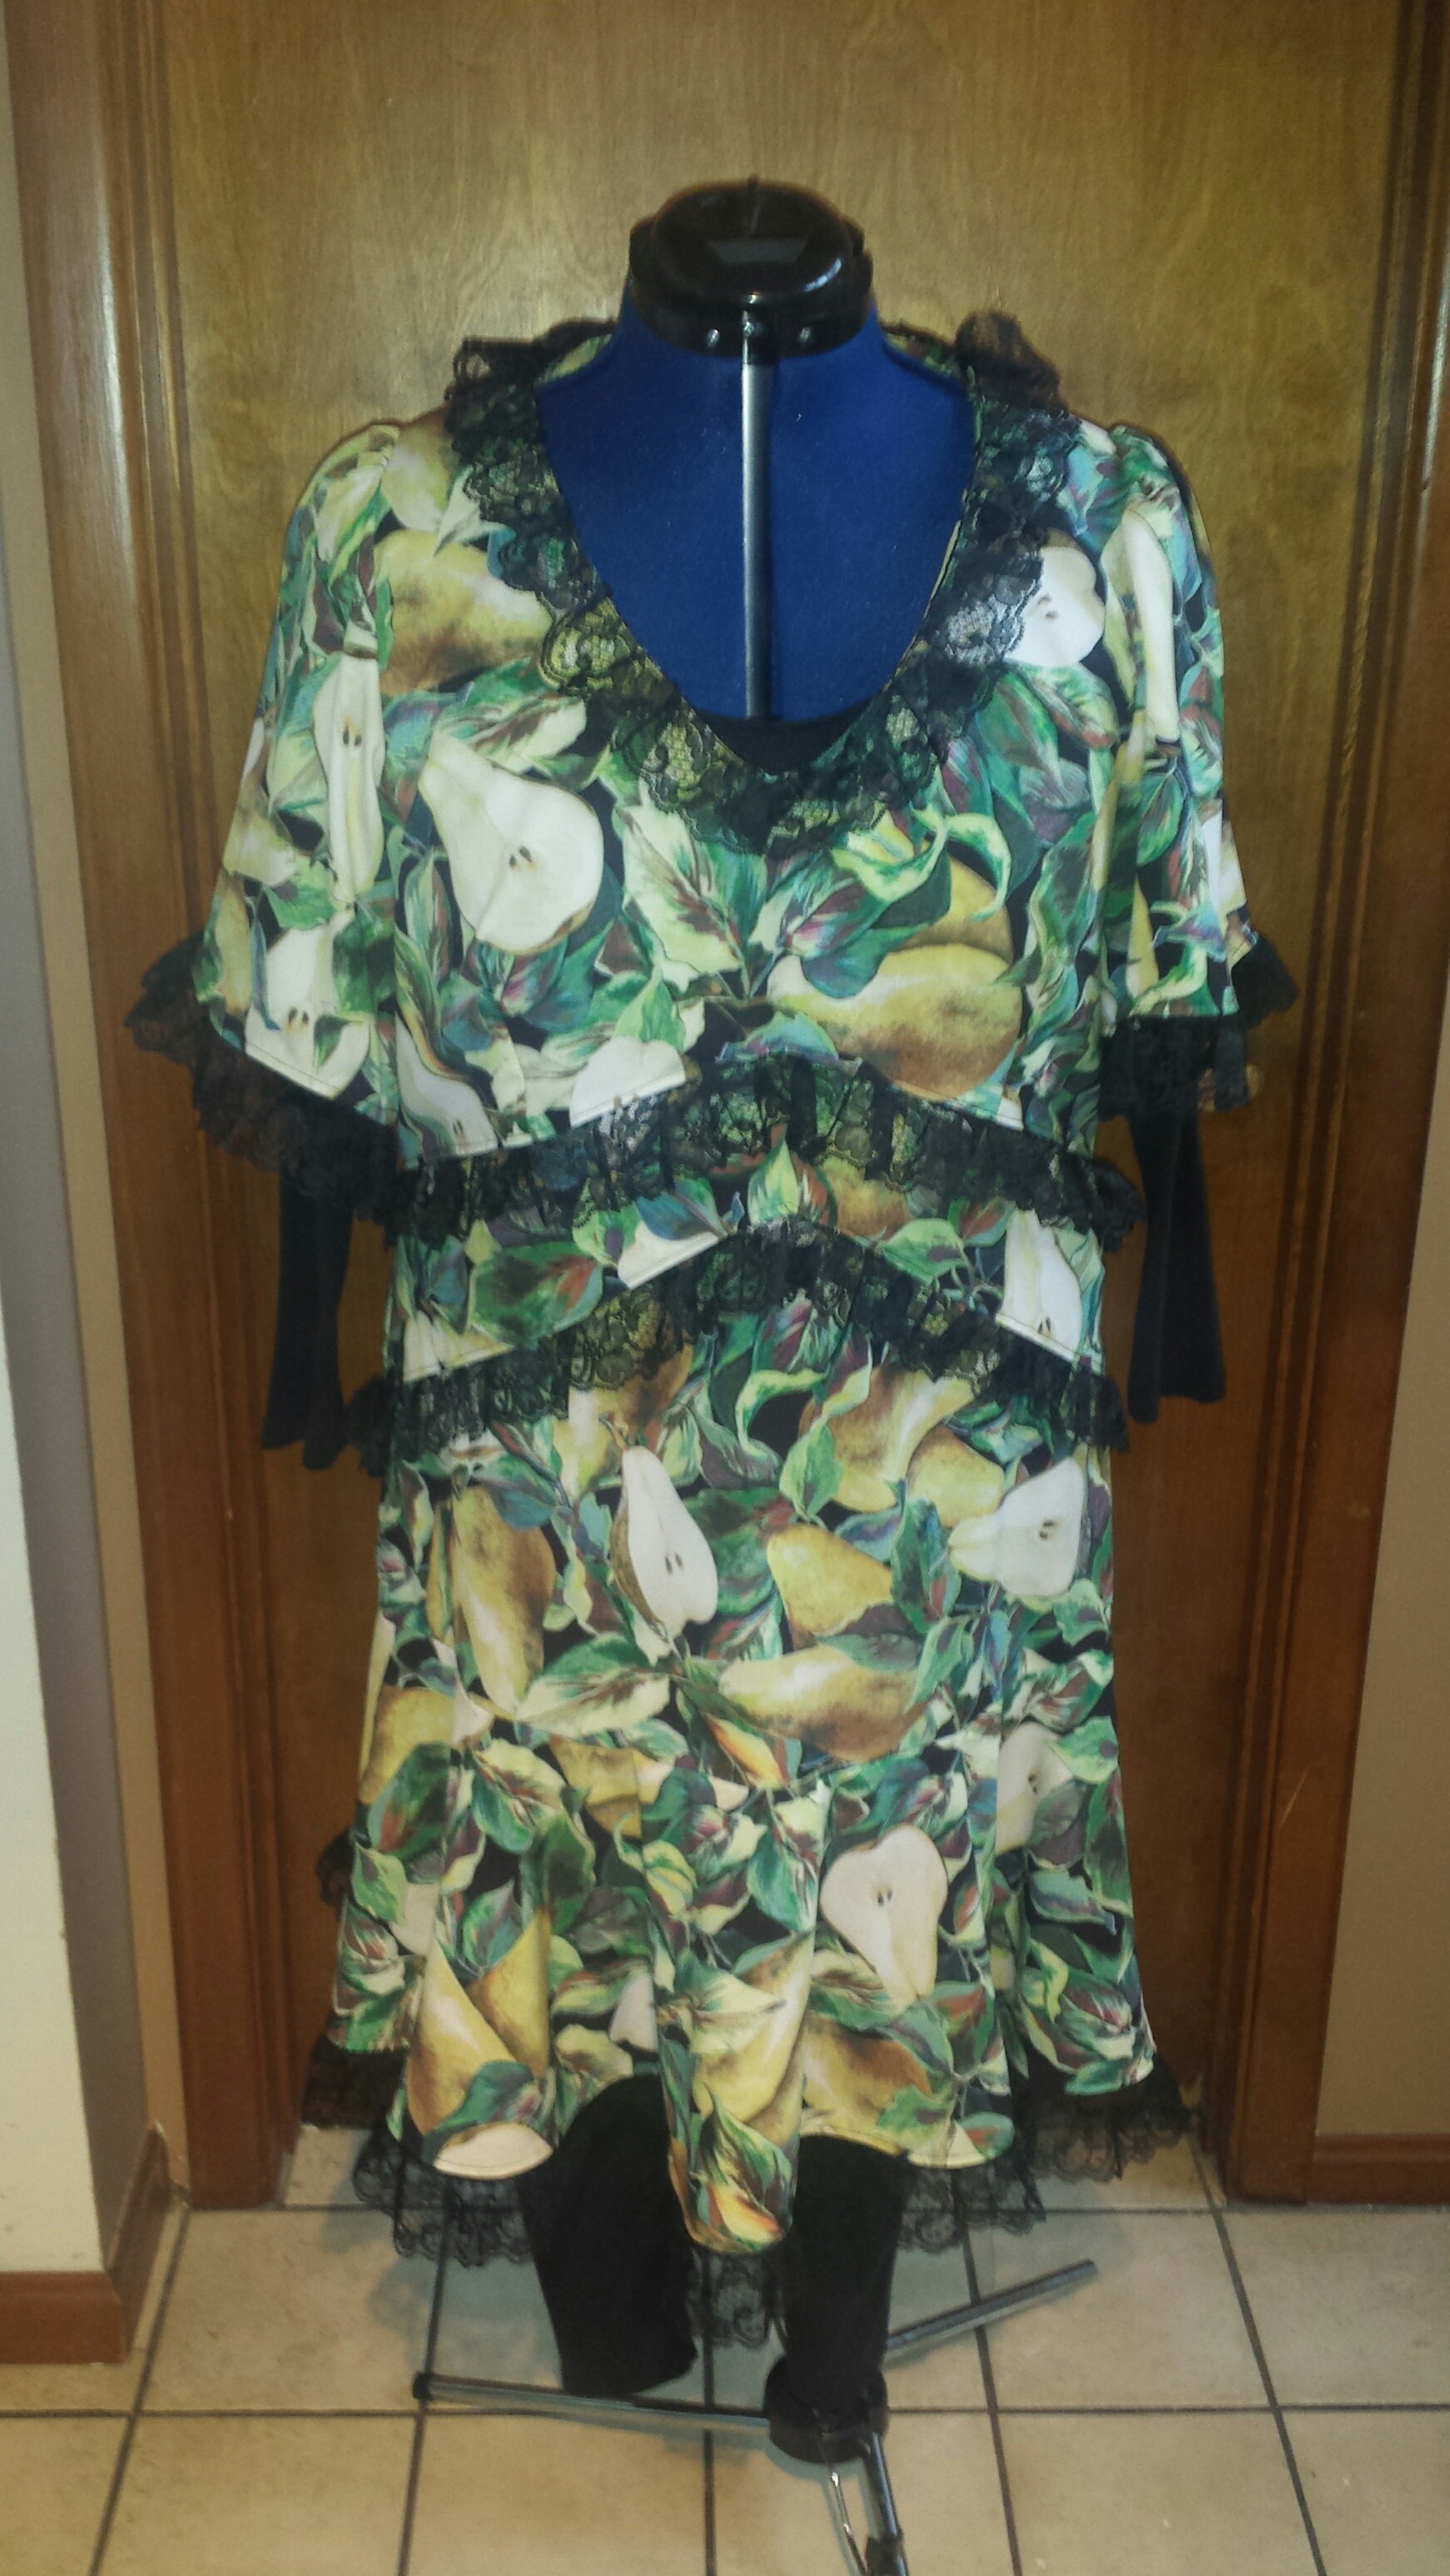
I basted the lace along the bias edges, then sewed the seams with the machine. After a quick test fit, I tweaked a few vertical seams. Then, I finished all the seams with the serger. I based lace along the bottom of the sleeve and the hem. Then I resewed them with the serger. I turned the serged edge under, and topstitched. I finished the neckline last. I basted the lace to the edge, applied the facing, turned the facing under and topstitched.

Leave a comment

Filed under sewing

Vogue 1241 Kay Unger Dress

This Vogue Kay Unger dress is just loaded with cute design features. Sadly the sample garment in the photograph on the pattern envelope is made up in a print that hides some of the coolest features. And the description on the pattern envelope is just 4 words!

I made this dress for a post wedding brunch. It’s not too dressy and not too casual and perfectly comfortable.

I used a border print from my stash. I don’t know where it came from, no tags, and don’t remember the project I had planned for it. But, it’s sweet and summery and perfect, so I chose it.

I chose not to line the dress, because this challis is nicely opaque and I’ll be wearing a bra slip under it anyway. I made this dress before, and the neckline came out scandalously low! This time I decided to make a simple neckline with no overlap, slit or gap in front, just the tucks in the pattern.

To do this, I folded the center bodice pattern piece along the center front line marked on the piece. Then, I lined that center front line up on a fold. The neckline of the pattern didn’t reach the fold, so I just sort of eyeballed that cut.

I don’t care for the sleeveless look, so I swiped an elbow length sleeve from another pattern (maybe Lekala) and cut sleeves out of the border.

I marked a line along the bottom of the border, above the selvedge near the stems of the flowers in the border. I used that line as my hem guide. I placed the front apron piece on my fabric, lining up the bottom cut line of the pattern with the marked line on the fabric. Then, on a double thickness, I put the front side pieces on the fabric, lining up the bottom cut line on the pattern with the marked line on the fabric. I repeated this for the back pieces.

I followed the assembly steps in the instructions, on the machine with an ordinary straight stitch. I didn’t think things through, and sewed the back seam up zipperless. When I did my try-on, the dress slid on easily enough, so I decided to just skip the zip. I marked a few adjustments, resewed, and tried it on again. Happy with the results, I finished the seams on the serger.

Omitting the lining meant drafting a facing. I used the center front and back lining pattern pieces to draft a facing. The pattern calls for interfacing the fashion fabric over the tucks at the neck in the front bodice, due to the lining. Because I had no lining, I chose to apply the interfacing to the facing.

Next I inserted the sleeves. I pinned them in place, tried the dress on, machine stitched them in place, tried the dress on again, and finally finished the armholes with the serger.

The sleeves came out a bit shorter than I’d hoped, so I finished them with a faced hem attached with a narrow seam to preserve as much length as possible. I used the machine to blind stitch the facing. I also used the machine to blind stitch the hem, after turning it up twice and pressings.


<b>Pattern Description: </b>
The little blurb on the back of the pattern envelope is harshly short – “Close fitting lined dress”. This sleeveless dress is actually really cool. It has ruched princess seams in front, with empire waist, bib inset, and overlapped bodice. The back has long, curved, ruched darts.

<b>Pattern Sizing:</b>
Misses 8 – 22

<b>Did it look like the photo/drawing on the pattern envelope once you were done sewing with it?</b>
Yes except for my changes

<b>Were the instructions easy to follow?</b>
Yes, they were clear and not too hard to follow

<b>What did you particularly like or dislike about the pattern?</b>
I love the ruched princess seams and darts. I disliked the overlapped bodice, so I simply cut the bodice as all one piece. I also added sleeves and omitted the lining.

<b>Fabric Used:</b>
Rayon challis in a border print

<b>Pattern alterations or any design changes you made:</b>
I don’t care for the overlapped bodice. The last time I made this pattern it opened way too low. So, this time I cut the bodice as one piece. I omitted the lining and added sleeves.

<b>Would you sew it again? Would you recommend it to others?</b>
Yes, I might sew it again. Yes, I recommend it.

Leave a comment

Filed under sewing

Boundless Style – Book Review

Boundless Style is a pattern book and companion website with coordinating bodices, sleeves and skirts. All the pieces can be mixed and matched, and if that doesn’t give you enough combinations, suggestions for design variations are included. The author is Kristianna Boos, designer of Victory Patterns. The pattern pieces are on an enclosed dvd.

Boundless Style offers five bodices, skirts, and sleeves. The bodices are all fitted and stop at waist length, so they can be joined to any of the skirts. All the sleeve styles are set in sleeves. These are not your usual basics. They are strong, unique design styles.

Table of Contents

Introduction

Chapter 1: Getting Started

Chapter 2: Tools

Chapter 3: Skills and Techniques

Chapter 4: Bodices

Chapter 5; Sleeves

Chapter 6: Skirts

Chapter 7: Putting it All Together

Index

About the Author

The Introduction is a brief three paragraphs. It does exactly what an introduction is supposed to do, and does it elegantly. It explains the inspiration, describes the concept, and introduces the contents.

Getting Started explains how to use the online lookbook to create unique looks, how to join the design group, how to see other people’s public designs, and how to keep your own public or private.

Unfortunately the URL provided in the text (https://lookbook.victorypatterns.com) does not exist. The URL https://victorypatterns.com/blogs/victory-patterns-blog/welcome-to-lookbook-for-boundless-style  takes you to an article about Boundless Style on the Victory Patterns website. But, it does not have any active links, and I was unable to find anything else about the lookbook.

The book itself goes on to cover printing, assembling and tracing patterns. It discusses fabrics, notions and supplies. It includes diagrams for laying out pattern pieces on fabric and how to find the sizes on the pattern pieces. Then it goes on to discuss fitting, from measuring and sizing charts to grading between sizes, lengthening and shortening and fitting as you sew.

Tools divides sewing tools into six categories: pins and needles, marking tools, measuring tools, cutting tools, pressing tools and notions and supplies. It’s an extensive list!

Skills and Techniques is divided into Marking, Hand Stitching Techniques, Machine Stitching Techniques, and Finishing Touches. I’m not sure I love this particular way of dividing things, because Hand Stitching is a single page demonstrating how to make 4 different hand stitches. Machine Stitching Techniques is 9 pages long and covers directional sewing, gathering by machine, ease stitching by machine, inserting a sleeve, eliminating bulk, sewing darts, stabilizing seams, understitching, top stitching and ditch stitching. Finishing Touches is 7 pages long and covers making bias tape, piping seams, installing centered zippers and installing invisible zippers.

The Bodices chapter dives into the patterns. It includes five bodices; Catrina, Jackie, Celine, Georgia, and Billie. Each of these bodices has a strong design statement. Catrina has princess seams originating high on the armhole. Jackie has a deep V that can be in front or in back. The opposite side has a jewel neckline and optional contrasting wrap at the waist. Celine has unique central darts and an optional tie neck. Georgia is a wrap style top with yoke and gathers. Billie has a jewel neck with a stand up collar and shaping seams running from low on the armhole to a center point at the waist.

The instructions for each pattern starts off with the technical drawing (s) for all versions. A Skills box lists the sewing skills needed to complete that pattern, and instructions on how to choose your size. Photos of sewn examples of the pattern pepper the chapters, and each photo includes Design Notes that describe the elements used (bodice, etc) and the fabrics used. Inventory sheets list the pattern pieces used, tools, fabric, and supplies required, and suggested fabrics. They’re followed by step by step instructions, each one illustrated with a clear color photograph.

Only the instructions for Jackie explain how to insert sleeves or finish the armholes for a sleeveless bodice. The instructions for the other blouses do not touch on sleeves or finishing armholes, although the photographs show sleeved garments.

Sleeves covers five sleeves: Moss (cap), Grace (fitten) Farah (long, full) Monroe (two piece box pleat, 3/4) and Berdot (somewhat loose, short, 3/4 or long).  It begins by explaining a set in sleeve pattern piece. Like the Bodices chapter, each sleeve has a technical drawing (s) for all versions, Skills box lists the sewing skills needed to complete that pattern, and instructions on how to choose your size. Photos of sewn examples and Design Notes offer suggestions for bodice and skirt combinations to go with the sleeve. Inventory sheets list the pattern pieces used, tools, fabric, and supplies required, and suggested fabrics. They’re followed by step by step instructions, each one illustrated with a clear color photograph. The final section explains how to finish a sleeveless bodice.

Moss shows one version, because there isn’t much you can do with a simple cap sleeve, although they do suggest using a contrasting fabric for the sleeve. Grace is shown in three different lengths, short, three quarter, and long. Farah also has one version, gathered at the wrist with a narrow band. Monroe clever, unique sleeve. Instead of ease or gathers, all the upper arm fullness is in a single box pleat. The fullness is pinched back in at the elbow, giving the sleeve and ever so slightly hint of leg-o-mutton. The coolest feature is the inside of the pleat can be a different color. Bardot is a loose but not full sleeve. Instead of gathers, the fullness is distributed into two tucks meeting at the shoulder seam.

Skirts includes five silhouettes, Frieda (dirndl) Ella (a-line) Sophia (pencil with kick pleat) Meryl (full) and Lydia (pleated).  The skirt lengths are peplum (very short, blouse length, not a dress), cocktail (just above the knee), Lydia Tea (just below the knee), Ella and Sophia Tea (a few inches below the knee) and mid-calf. Just like the chapters on Bodices and Sleeves, each style includes technical drawings, etc.

Frida is shown in peplum, cocktail and Tea (unspecified) length, plus tea length with a contrasting border. Ella is cut on the bias, and shown in peplum, cocktail, and Ella Tea lengths, plus a tea length with a flounce (not a ruffle) hem.  Sophia is shown in cocktail and Sophia Tea lengths, and instructions to use a centered rear zipper when making the skirt only (no bodice). Meryl is shown in peplum, cocktail and mid-calf versions. Lydia is shown in peplum, cocktail, and Lydia Tea lengths.

The chapter finishes with a discussion of skirt linings in general, and specific instructions for each version, illustrated with photographs.

Putting it all Together is divided into two sections. The first, Dress and Blouse Map  is a construction guide for making a blouse or dress, the second, Separate Skirt Map is a construction guide for making a skirt. The Dress and Blouse Map starts with an illustrated guide to the general construction steps, then covers setting in a sleeve, attaching the skirt to the bodice for lined and unlined dresses and blouses, inserting a side zipper for lined or unlined dress or blouse, inserting a skirt lining into a dress, inserting a waistline stay, balancing the hem, straight hem by machine, straight hem by hand and a curved hem. Like all the other techniques, each one is broken down step by step and illustrated with photographs.  Separate Skirt Map starts with and illustration of the basic construction steps and covers installing a zipper, attaching a lining, and attaching the skirt waistband. Zipper insertion is the only technique that is not covered in detail, because that was done elsewhere in the book.

CONCLUSION

There’s only so much you can do with a skirt. But the patterns for bodices (and to some degree the sleeves also) are strong, unique original designs you are unlikely to find anywhere else. When I visited the Victory Patterns website, none of the patterns in this book appeared anywhere.

I like the bodice styles and the pleated sleeves are really interesting.

I have not actually used any of these pattern pieces yet, and I’ve never used a Victory Pattern, so I can’t comment on sizing or drafting. I can say that these instructions are very clear. And I like the inclusion of a waist stay on the dress patterns.


Leave a comment

Filed under book review

McCalls 7298 Zipper Challenge – Sewing Bee Round 2

Zippers are the theme for Round 2 of the Sewing Bee Challenge.

When I think of zippers as a focal point, I think of designs with interesting seam lines to insert zippers. My second thought was a moto jacket. I’ve wanted to make a longer length moto jacket with an asymmetrical zip. But with no pattern at all, I think that’s too much to tackle for this time frame.

My pattern stash had two good options. Vogue  8995 and McCalls  7298 .  I just made a cardigan jacket for the previous round, so I was a little bit reluctant to make a second jacket. But, the pattern offers opportunities to make zippers a focal point,  I have some gorgeous knit wool I’ve been aching to make into a warm, snuggly jacket, and I wear jackets far more often than I wear dresses. So, a jacket it is.

I had the wool knit and the pattern, now I needed some fabric for color blocking, a low-static-electricity lining for the hood (the wool knit made my hair stand on end), and, of course, a pile of zippers.

My primary access to quick zippers is Pat Catan Crafts. I knew I wouldn’t find a matching set of zips. The inventory always seems like random leftovers. I decided to use different types of zippers for different applications.

I choose a dark green athletic knit, leftovers from another project, to make the color blocked shoulder patches. I did NOT want the “cold at the patch” thing to happen, so there’s actually a layer of the wool knit behind the green fabric.

But, the green was still a little too static-y for my hair. I found a rich lilac cotton thermal knit that’s ok on my hair. I used it to line the hood and make a peek-a-boo strip behind a decorative zipper in the hood. I decided to use the lilac for the pocket pouches.

ZIPPERS:

I used 4 different kinds of zippers in 4 different ways

Kinds of Zippers:

Separating Zipper, center front YKK Sport zipper, composition unknown

Closed end polyester zippers, on the sleeve vents and sleeve pocket

Closed end aluminum zippers on the front pockets

Double sided antique brass zipper on the peek-a-boo hood and pieces as embellishment

Uses:

Functional, Necessary: The center front zip works, and is needed to get in and out of the jacket

Functional, Optional: The pocket zippers (on sleeve and front) and vent zippers all work.  Zippers are not mandatory in pockets, these zippers are just nice to have. Same is true for the vent zippers. They work, but chances are I’ll never actually use them because the cuff opening is kind of wide. So they’re mostly decorative.

Functioning, Just For Fun: The peek-a-boo zipper on the hood works, it opens and closes both ways, but really doesn’t do anything except expose or conceal the peek-a-boo lining.

Parts, as Embellishment: I used zipper teeth as piping on  the green colorblocked front, and added zipper feet to the green blocks.

CONSTRUCTION:

I followed the instruction sheet for which pattern pieces to cut. I decided to tackle the peek-a-boo hood first. I cut a strip of lining, positioned the zip along one side of the center seam of the hood, and machine basted it in place. Then I layered the  lilac lining over the zip, and sewed again. I flopped everything around and repeated the process on the other side of the hood. Then I sewed the center seam of the hood lining, put the hood and lining right side together, and sewed them together. I trimmed away the bulk at the curves at the front of the hood, flipped everything right side out, and set the finished hood to one side.

Next I tackled the sleeve pocket. I borrowed a tip from Angela Wolf and made the pocket wide enough to extend from one side of the sleeve to the other, both sides anchored in the sleeve seam.

Then I installed the zips on the sleeve vents, and set the sleeves to one side.

I looked for the instructions. Gone! Vanished without a trace. Oh well, I think I can muddle through somehow.

I basted the green fabric to the wool underpieces, then basted the decorative zipper tape in place, on both top and bottom of the green piece. Then I sewed the lower front body to the green piece, then the green piece to the little shoulder wedge piece, and finally, front to back at shoulder seams. I sewed the side seams and sleeve seams and inserted the sleeves.

At this point I was worried if I’d have enough time to finish, so I decided applying the hood was a higher priority than the front pockets. So, the hood went on first. Then the separating zipper in the front, and finally, the front pockets. Last step was the hem.

Even if this jacket does not get me to Round 3, KC the Cat loves it!

Leave a comment

Filed under sewing